
Preliminary Steps
Information: This tutorial will be based on a French army vehicle, the VT4 (normally available on the Arma workshop when this tutorial is published).
1. Create Necessary Folders
To start your project correctly, create a folder specifically for your project to centralize your files and other resources.
Once this folder is created, make two subfolders:
- One for 3D models, name it "Sources"
- Create another subfolder within "Sources" called "Textures"
2. Create an ENFUSION Project
Once the project is created, open it in your file explorer (Windows), and bohemia interactive recommend creating this folder structure:
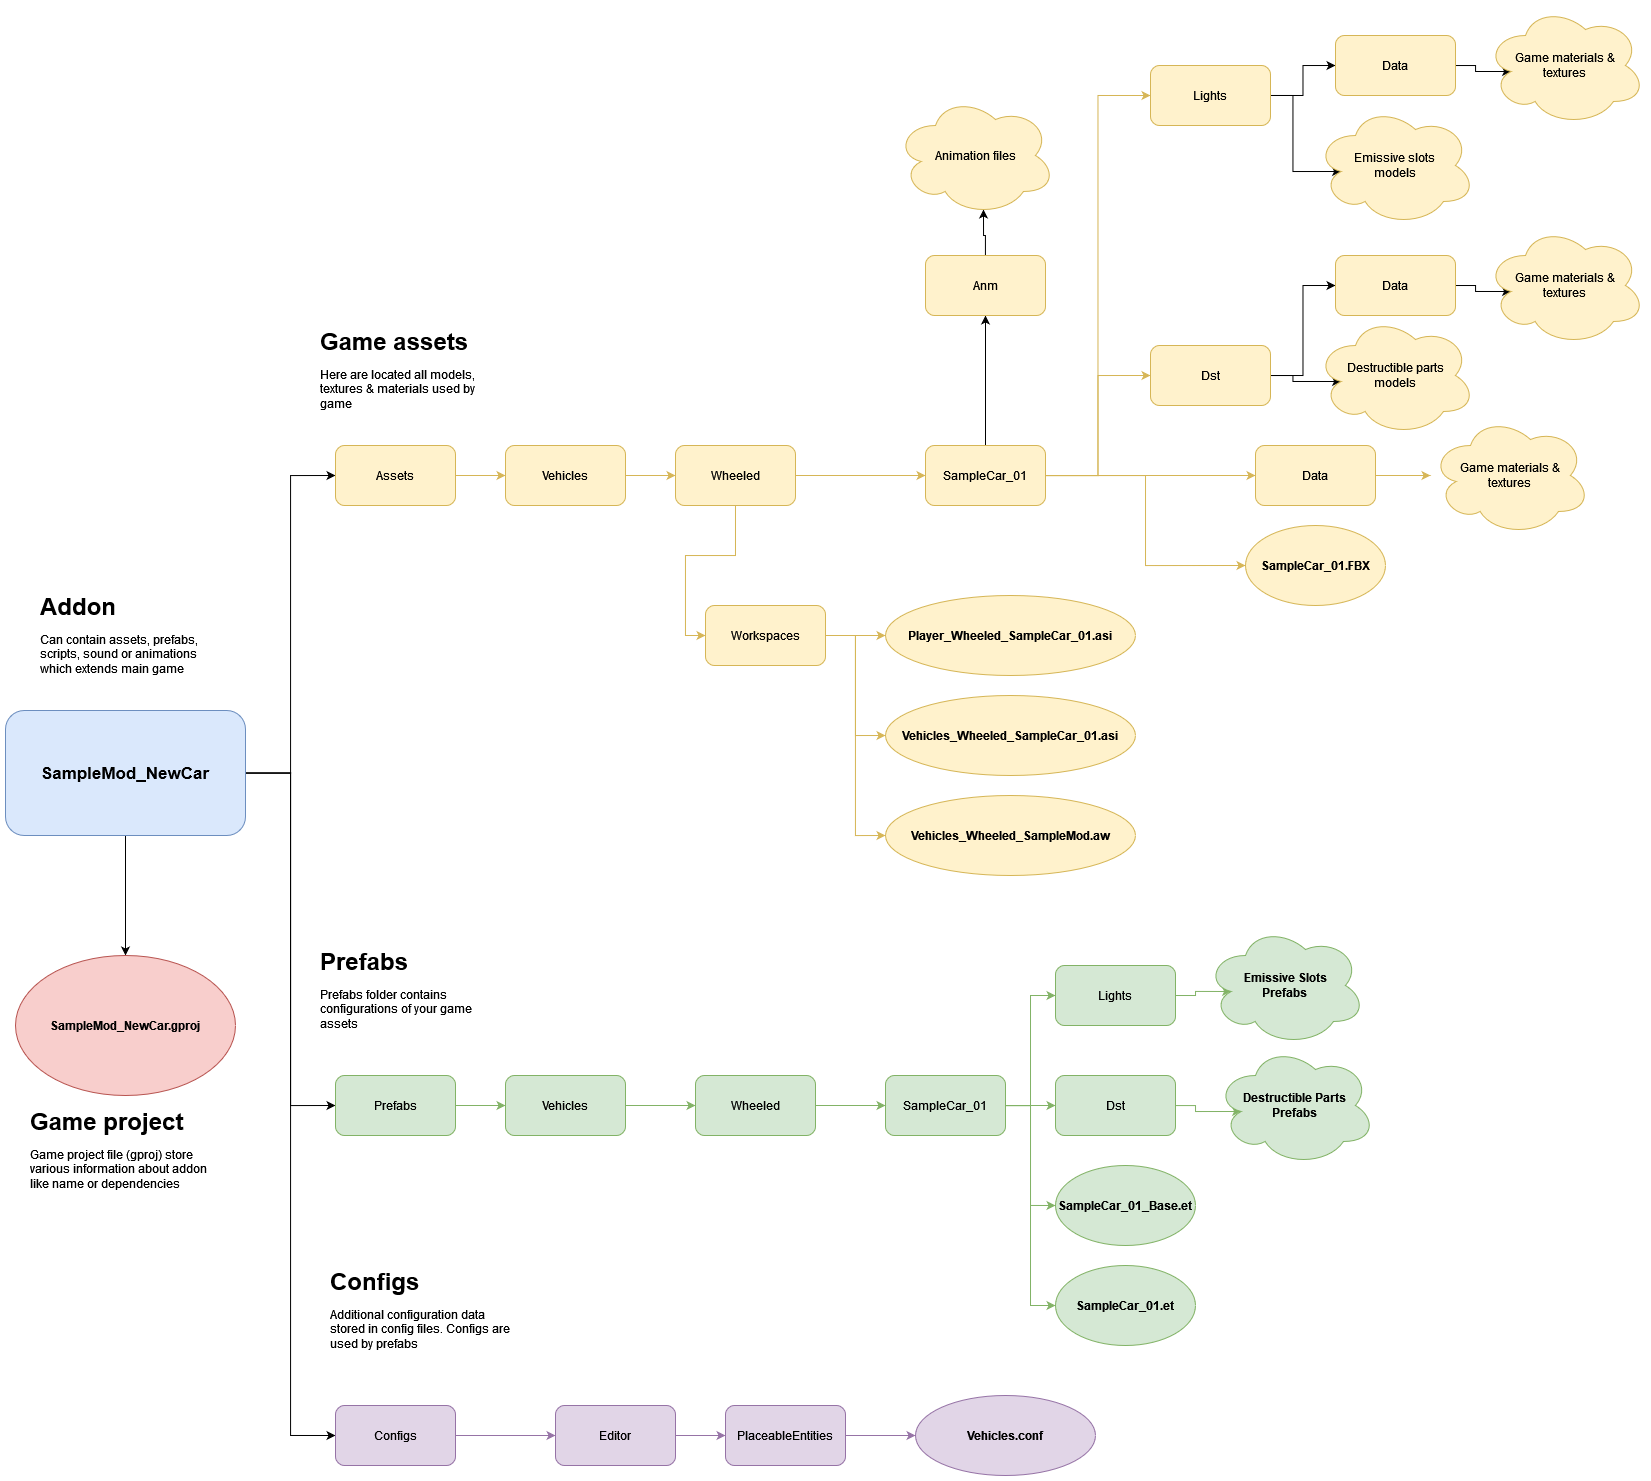
Recommended File Structure for Arma Reforger You can organize it differently, but you may encounter bugs and difficulties.
Reminder: Rectangles represent folders. Bubbles & clouds represent a file or other item.
And, of course, replace "SampleCar_01" with the name of your vehicle, following this format.
Once this is done, you can move on to the next step.
2. The 3D Model
The next step is to find an appropriate 3D model. Here are some tips for choosing well:
- Low poly PBR model (like Unreal Engine or Unity)
- With interior (if possible)
- A manageable quantity of polygon
3. Vehicle creation "RoadMap"
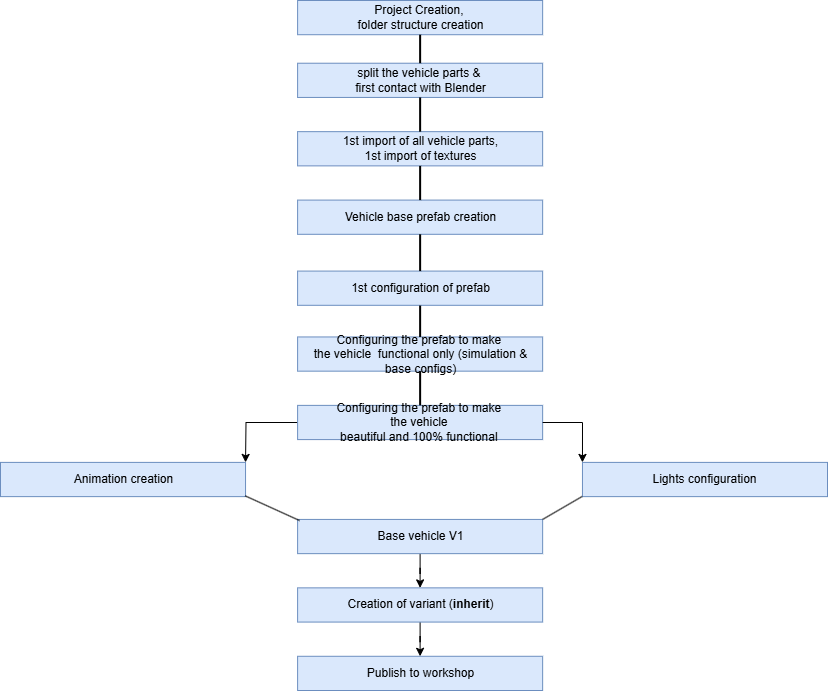
If you need to, you can go back at any stage to the previous stages to achieve a good final result.