
Make a landing gear system for a helicopter
Introduction
The idea is to use the basic car trunk script from Ed Bohemia's tutorial, modifying it to move (translate/rotate) a bone in the skeleton.
(you can download the basic car and see how the make the trunk function:https://github.com/BohemiaInteractive/Arma-Reforger-Samples/tree/main/SampleMod_NewCar)function) you can go see the vertex part here: tutorial vertex and anim
First part:1. skeleton +and bone.bone
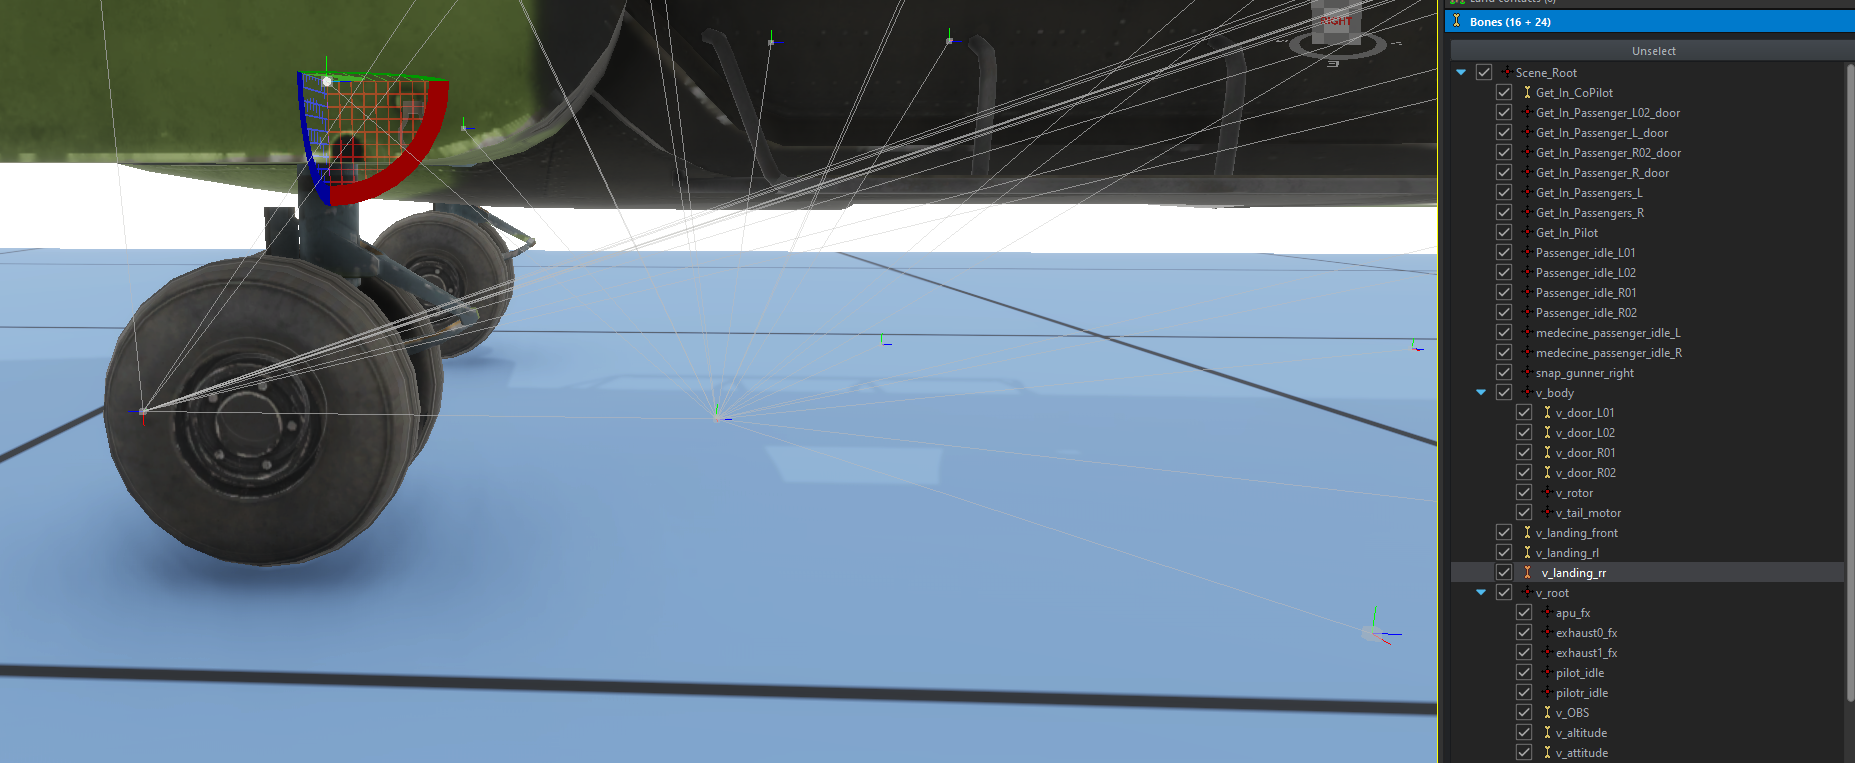
Pour faire l'animation, un bone et un vertex group doit être crée. Dans le tutoriel, le bone qui va faire bouger la roue va s'appeler "v_landing_rr" (vous pouvez bien sûr le nommer comme vous le voulez).
2. Les fichiers d'animations procédurales
nousVous allonspouvez utilsierretrouver ces deux fichiers en pièce jointes en bas de ce tutoriel, vous avez le componenetdroit carprocanimde les utiliser librement (vous pouvez nous créditer si vous le souhaitez 👍).
commentVous pouvez les placer dans "{YOUR_ADDON}/anims".
Rappel: Explications du fonctionnement des animations procédurales:
1. le carproc.siga
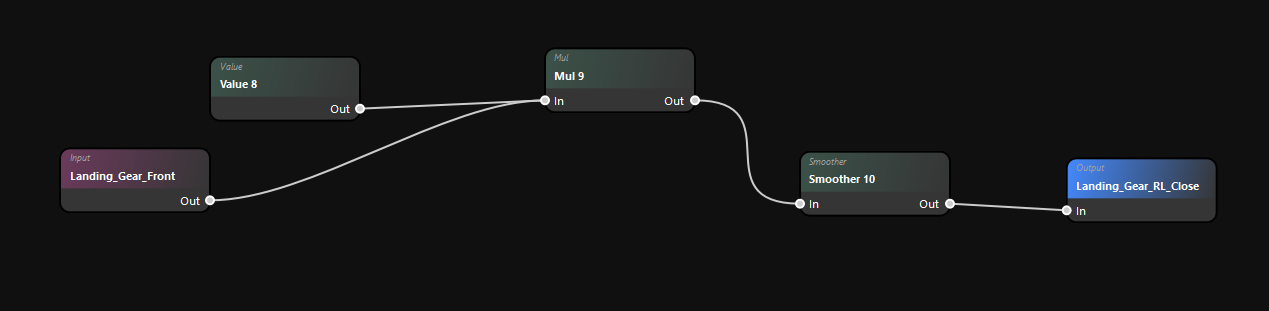
- L'imput
animestamrcheilleylanceura 1du signal pour l'animation ⚡ - Value 8 correspond à la rotation max de l'animation en pratique (-80°)
- Smoother 10 permet d'adoucir l'animation pour éviter qu'elle soit trop brutale
2. L'animation .pap
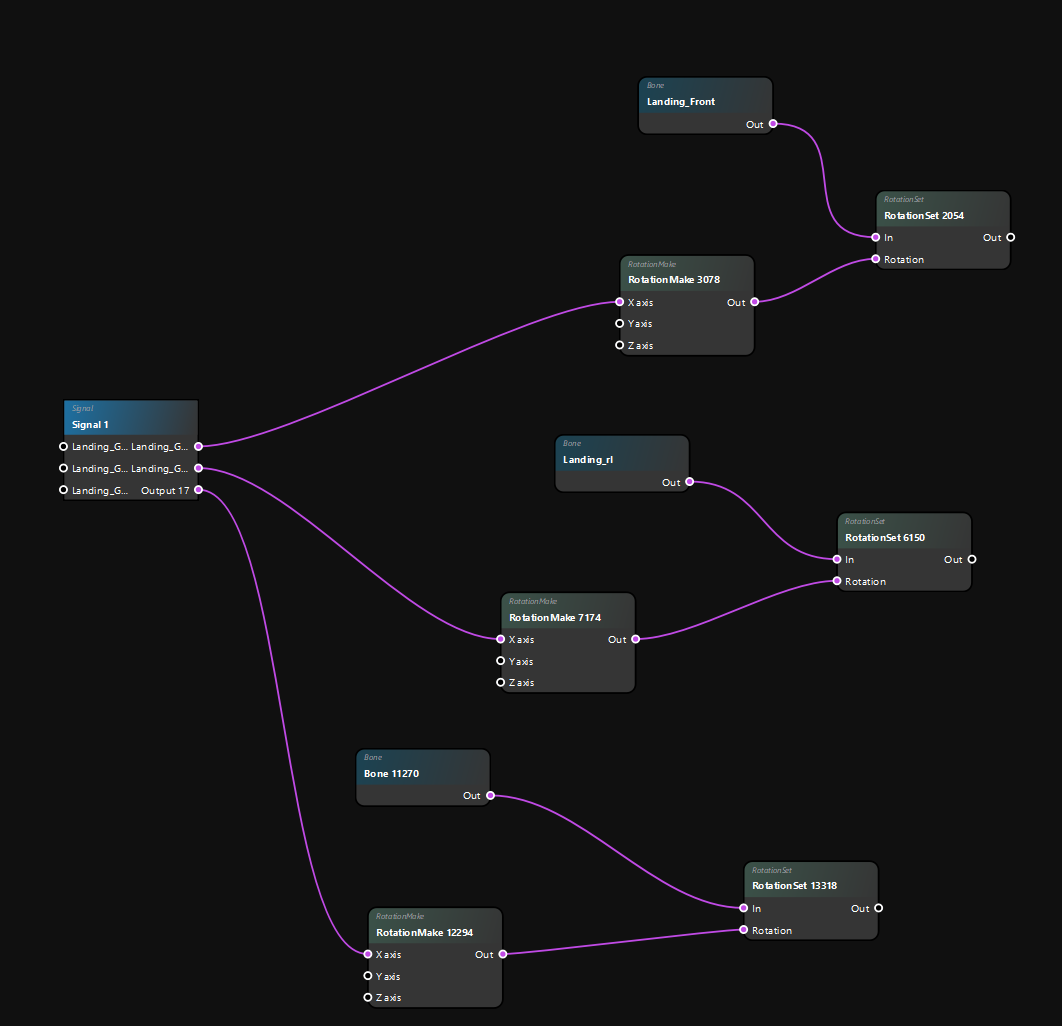
- Signal 1: Permet de faire le lien entre le fichier .siga et le
fichier.pap, on peux y trouver des ports pour faire des liens avec les instructions d'animanimations - Rotation Make permet de dire de réaliser la rotation
- RotationSet: Permet de configurer la rotation (notamment pour définir si oui ou non on met à jour les colliders)
- Bone: Définit l'os qui va bouger
Tips: En cliquant dans le vide, vous pouvez définir un modèle d'exemple et .pap
1er partie le .siga
l'input sera le lanceur du signal
value seraavec la positionfenêtre de"signal departsimulation",
vous pouvez tester en direct votre animation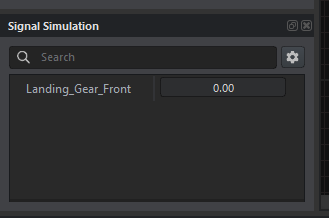
3. Les actions pour pouvoir déclencher l'animation
2eme1. partieCréer le .pap
3 Action manager
a. l'action manager
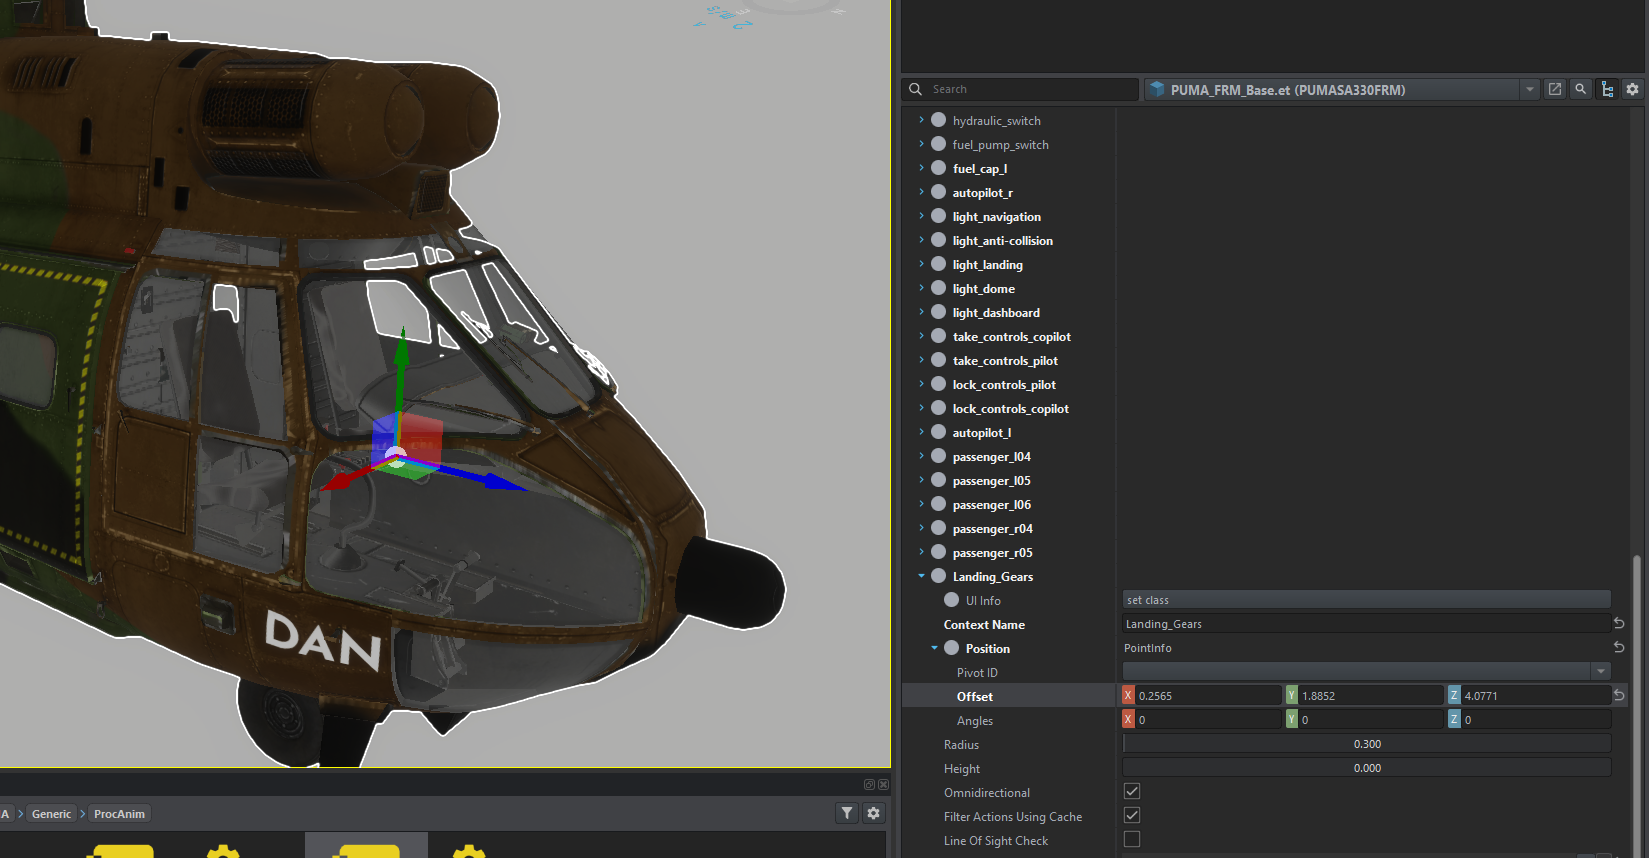
1. Créer l'action additionnel
b.Ajoutez additionall'action infoadditionnel "SCR_TrunkUserAction" avec le petit + de la catégorie "Additionnal Actions" dans le component ActionManagerComponent
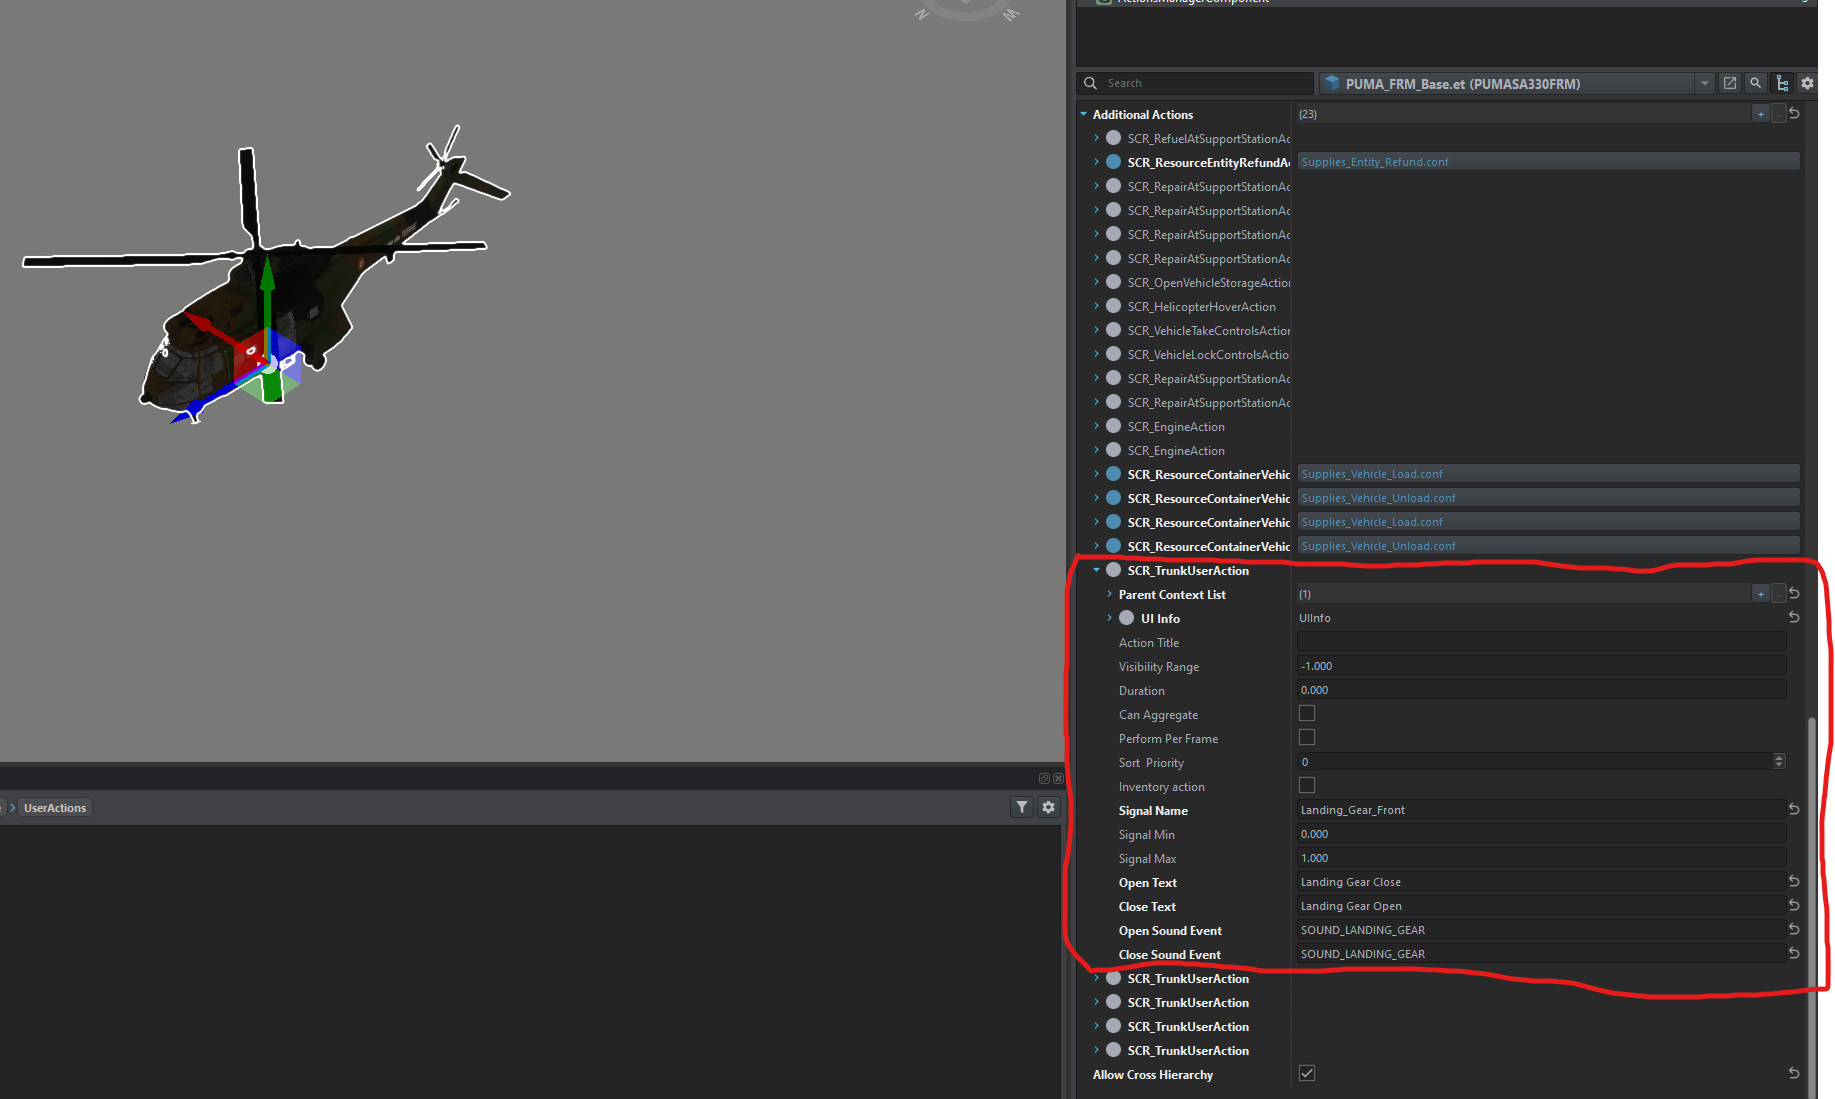
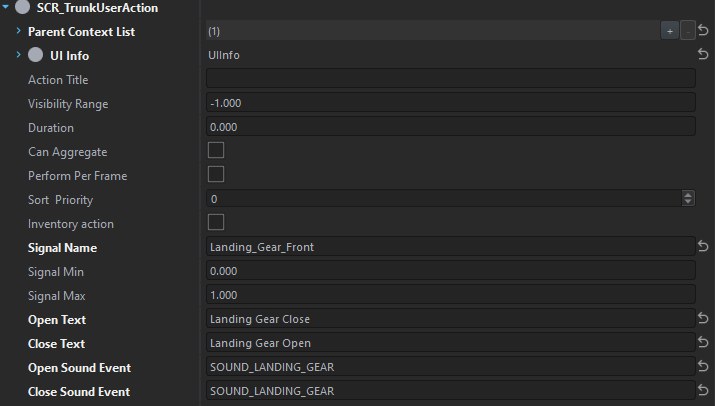
Une fois crée, vous avez plus qu'a mettre ces paramètres dans l'additionalaction:
- Dans
info"Parent Context List", mettez l'action que vous avez crée plus haut - Signal Name va
appelerporter le nom que vous avez défini dans le fichier signal (.siga)
4. Le script
Rappel: Pour que le script soit pris en compte, il doit se trouver dans au minimum un dossier "scripts/Game/UserActions"
Créer un fichier script dans lequelce ilrépertoire qui s'appelle "SCR_CarTrunkUserAction.c", ouvrez le puis mettez y a plusieur contenu
signal Name will be the name in the .siga input
here is the content of the script filecela:
//French Reforger Mod - Landing Gears tutorial

class SCR_TrunkUserAction : ScriptedUserAction
{
	[Attribute(defvalue: "Drawer 1", uiwidget: UIWidgets.EditBox, desc: "Signal name of trunk action in procedural animation project")]
	protected string m_sSignalName;	//for pairing with the user action

	[Attribute(defvalue: "0", uiwidget: UIWidgets.EditBox, desc: "Value of signal when trunk is closed")]
	protected float m_fSignalMin;

	[Attribute(defvalue: "1", uiwidget: UIWidgets.EditBox, desc: "Value of signal when trunk is opened")]
	protected float m_fSignalMax;

	[Attribute(defvalue: "Open", uiwidget: UIWidgets.EditBox, desc: "Text for the 'Open' action")]
	protected string m_sOpenText;  // Texte pour l'action "Open"

	[Attribute(defvalue: "Close", uiwidget: UIWidgets.EditBox, desc: "Text for the 'Close' action")]
	protected string m_sCloseText;  // Texte pour l'action "Close"

	[Attribute(defvalue: "SOUND_CONTAINER_OPEN", uiwidget: UIWidgets.EditBox, desc: "Sound event name when opening")]
	protected string m_sOpenSoundEvent;  // Événement sonore pour l'ouverture

	[Attribute(defvalue: "SOUND_CONTAINER_CLOSE", uiwidget: UIWidgets.EditBox, desc: "Sound event name when closing")]
	protected string m_sCloseSoundEvent;  // Événement sonore pour la fermeture

	protected int m_iSignalIndex = -1;

	//! Signal manager to pass signals into proc anim
	private SignalsManagerComponent m_SignalsManager;
	//! Sound component
	private SCR_VehicleSoundComponent m_SoundComponent;

	//------------------------------------------------------------------------------------------------
	override bool CanBeShownScript(IEntity user)
	{
		return CanBePerformedScript(user);
	}

	//------------------------------------------------------------------------------------------------
	override bool CanBePerformedScript(IEntity user)
	{
		if(!m_SignalsManager)
			return false;

		if (m_iSignalIndex < 0)
		{
			m_iSignalIndex = m_SignalsManager.FindSignal(m_sSignalName);
			return false;
		}

		return true;
	}

	//---------------------------------------------------------
	override void PerformAction(IEntity pOwnerEntity, IEntity pUserEntity)
	{
		float targetValue = Math.AbsFloat((m_SignalsManager.GetSignalValue(m_iSignalIndex)) - m_fSignalMax);
		m_SignalsManager.SetSignalValue(m_iSignalIndex, targetValue);

		// Play sound
		if (m_SoundComponent)
		{
			if(targetValue > 0)
			{
				m_SoundComponent.SoundEvent(m_sOpenSoundEvent);  // Utilise l'événement sonore défini pour l'ouverture
			}
			else
			{
				m_SoundComponent.SoundEvent(m_sCloseSoundEvent);  // Utilise l'événement sonore défini pour la fermeture
			}
		}
	}

	//------------------------------------------------------------------------------------------------
	override bool GetActionNameScript(out string outName)
	{
		if((m_SignalsManager.GetSignalValue(m_iSignalIndex)) == 0)
		{
			outName = m_sOpenText;  // Utilise le texte défini pour l'ouverture
		} else
		{
			outName = m_sCloseText;  // Utilise le texte défini pour la fermeture
		}
		return true;
	}

	//------------------------------------------------------------------------------------------------
	override void Init(IEntity pOwnerEntity, GenericComponent pManagerComponent)
	{
		m_SignalsManager = SignalsManagerComponent.Cast(pOwnerEntity.FindComponent(SignalsManagerComponent));
		m_SoundComponent = SCR_VehicleSoundComponent.Cast(pOwnerEntity.FindComponent(SCR_VehicleSoundComponent));
	}
}
Une fois tout ce tutoriel fait, vous pouvez entièrement redémarrer le workbench et si vous avez bien tout fait, les roues devraient se déplacer, à vous maintenant de faire en sorte qu'elle le face bien ^^