3D Creation
A - Creating the Hierarchy
Start by creating your working hierarchy, right-click → New Collection.
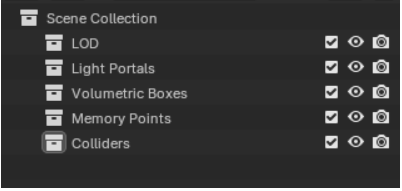
What do these collections mean?
- LOD: Contains all the LODs of the object you want to create.
- Light Portals: Contains window and door portals, as well as the BSP_n mesh.
- Volumetric Boxes: Contains the volumes of the building’s probe volume.
- Memory Points: Contains all the portal locations.
- Colliders: Contains colliders for object hardness in Arma.
- Occluders: Contains the building’s occluders, which help the player avoid loading objects beyond the wall.
B - Creating the LOD Mesh
This part will mainly be done in Blender, with an import into the Reforger tool at the end.
- Creating the 3D model
For building creation, there aren’t necessarily any difficulties; just remember that walls and floors are cubes with one visible face and one invisible face. This setup is essential to prevent collisions and in-game issues.
Example:
I’ve created a wall for the building’s frame by subdividing the edges of the foundation cube. As you can see, one side is split into three faces. Upon closer inspection, there are two faces overlapping inside (one visible and one invisible). THIS IS NOT GOOD.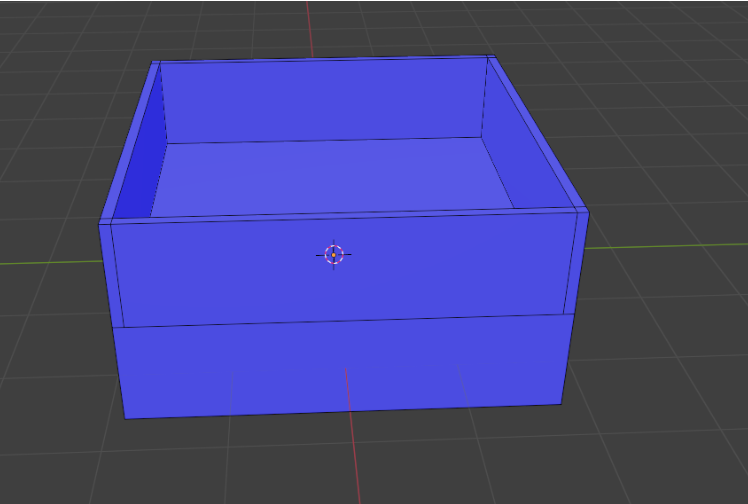
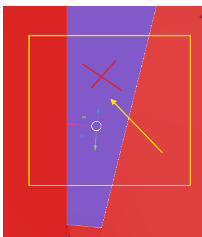
To delete if, select the face -> suppr -> deletefe face
after, you can create interior wall
- Adding Materials for MultiMat
After creating the interior walls, apply a material (an emat in Reforger), allowing up to 7 textures per material. Apply materials from the bottom up, floor by floor.
To Create a Material: Go to Material → + → name it logically, likeYOUR_OBJECT_NAME_INT_or_EXT_n.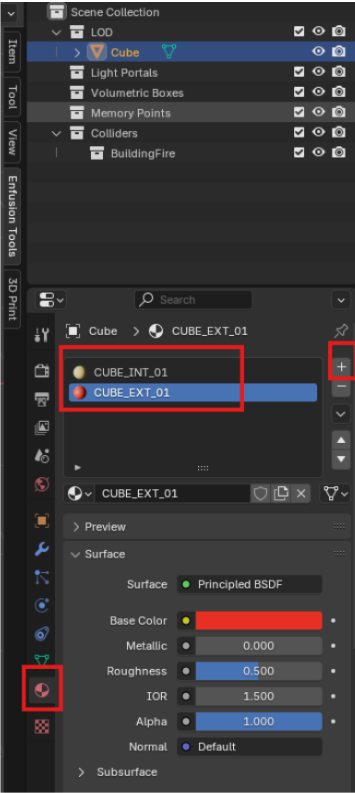
To Apply a Material: Select face(s) → Material → check the desired material → Assign. - Adding Door and Window Frames
In order to create thsi you will need to get the right dimensions here the wiki from reforger:
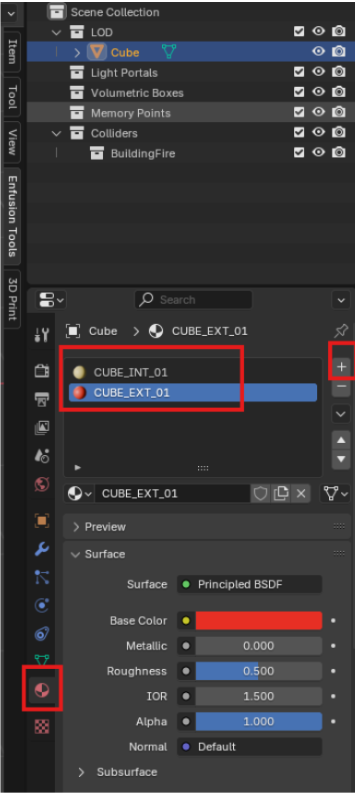
Measurement | Small Window | Large Window |
|---|---|---|
Min distance from the floor | 169 cm | 99 cm |
Common dimensions
Common dimensions
Height
47
72
118
142
182*
Width
70
70 × 47
70 × 72
-
70 × 142
70 × 182
90
-
90 × 72
-
90 × 142
90 × 182
110
-
-
110 × 118
110 × 142
-
130
-
130 × 72
-
130 × 142
130 × 182
170
-
170 × 72
-
170 × 142
170 × 182
195
-
195 × 72
195 × 142
195 × 182
-
* recommended ceiling height: 330 cm
Some other uncommon formats exist, such as e.g 260×230 for the air control tower.
It’s better to create cutouts for doors and windows by defining their dimensions precisely. Two techniques:
- Boolean Modifier: Create a cube with the dimensions, place it, then select the primary LOD → Modifier → Boolean → select the cube and apply. This method is fast but can cause complex edge and BSP issues.
- Subdivision Technique: For clean frames, subdivide edges to create door/window frames, keeping the edges as simple as possible.
Creating the Box Volume
Select all interior building faces, duplicate them, and form a cube with visible exterior faces. Do this floor by floor before adding the roof.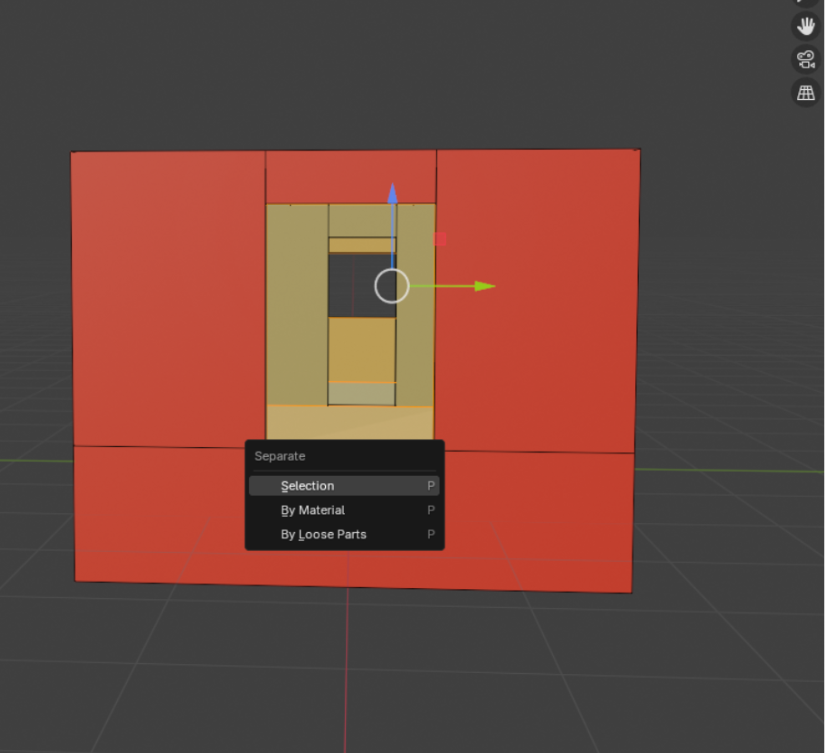
- Steps: In Edit Mode → Shift + D → Esc → P → Selection. Rename this mesh
BOXVOL_n, move it to Volumetric Boxes, remove its material, and apply dummyvolume. Simplify the shape by removing unnecessary edges and points.
- Steps: In Edit Mode → Shift + D → Esc → P → Selection. Rename this mesh
Creating Sockets for Portals
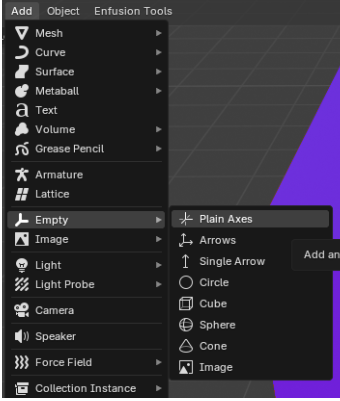
In the Memory Points collection, add an empty point.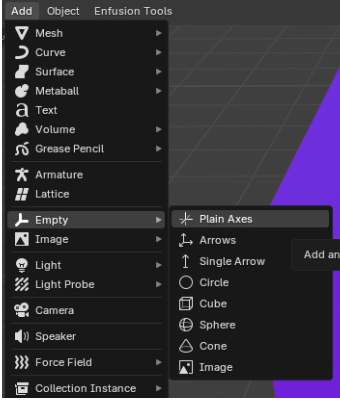
- Socket Naming Conventions:
socket_door_ext: for exterior doorssocket_door_int: for interior doorssocket_window: for windows
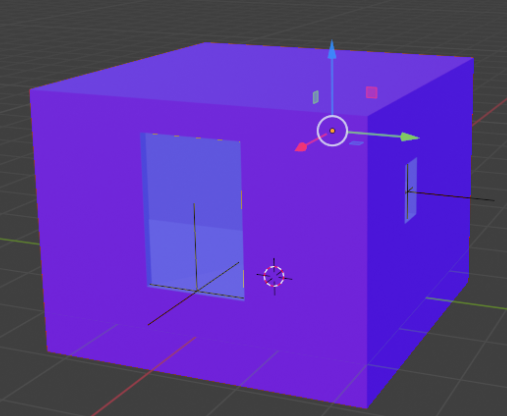
For doors, try to position them precisely in the center of the frame at ground level, and for windows, ensure they’re centered within their frames.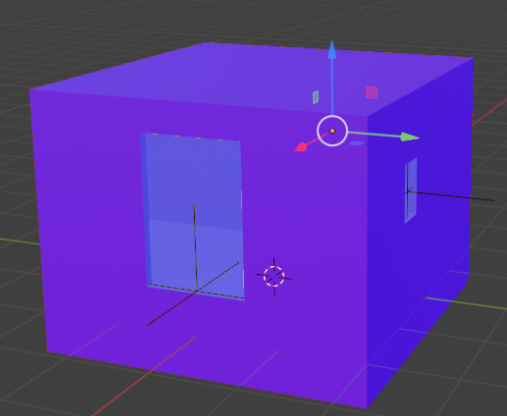
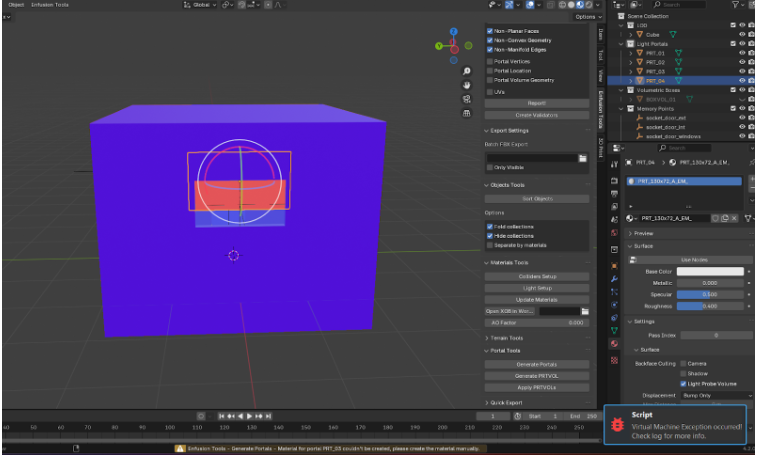
- Place sockets at the center of door and window frames. Once positioned, click Enfusion Tool → Generate Portals. Check the positioning and materials of the generated portals.
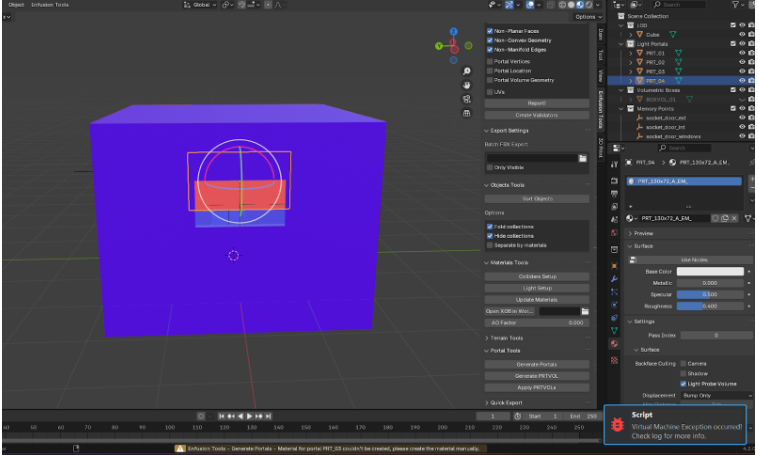
PRO TIPS:- Sometimes, portals are misaligned, and you can adjust them manually.
- Make sure to place the red faces on the outside.
- Some materials may not generate correctly if the frame dimensions are off, so it’s essential to refer to the available portal that matches the frame size.
- Use only one type of portal for single doors, double windows, etc.
Finally, the created portals have names like `PRT_DOOR_GARAGE_A_EM_` ending with “_”. Generate a GUID with the Enfusion tool to place it at the end of the material name: go to *Utilities* → *Generate GUID*.
- Socket Naming Conventions:
Creating the BSP
BSPs help attenuate sound within the building. Duplicate the LOD, remove excess details, rename itBSP_n, and place it in Light Portals with dummyvolume applied.
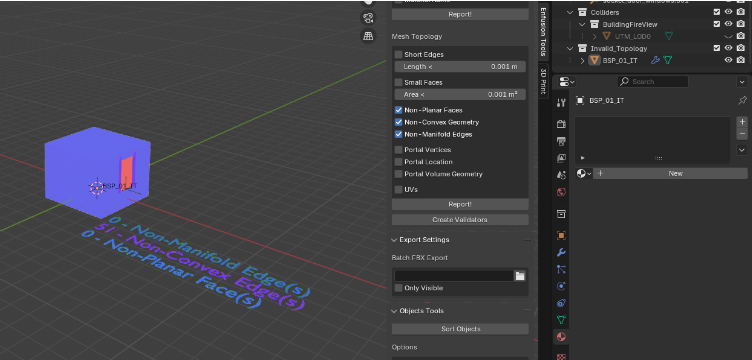
BSP Validation: Go to Enfusion Tool → Mesh Topology → Check “Non-Planar Faces,” “Non-Convex Geometry,” “Non-Manifold Edges” → Create Validator (Temporary BSPs appear in Invalid_Topology).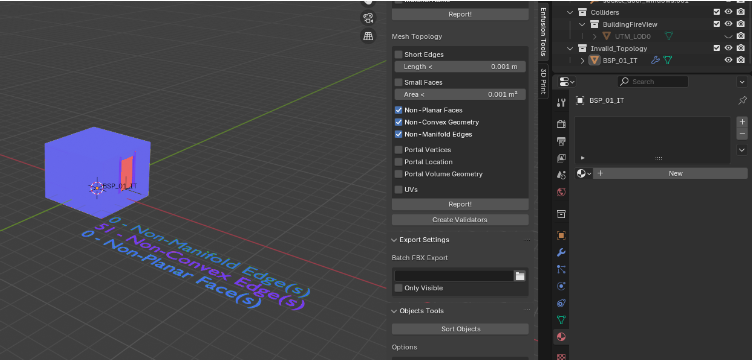
PRO TIPS:- 0 non-manifold edges and non-planar faces.
- Non-convex edges are acceptable.
LOD Verification
Once all your frames, box volumes, portals, and BSP are correctly set:- Check between walls to ensure there are no overlapping faces.
- Ensure each face has a maximum of four edges.
- Verify that all faces are oriented in the correct direction.
- Make sure each face has the correct material assigned.
- Confirm that the bottom faces are deleted.
- Dissolve unnecessary edges and reduce the number of points as much as possible.
Pro tips: This order applies to a single-story building; if additional floors are added, the BSP and box volume setup will differ.
Apply Weighted Normal
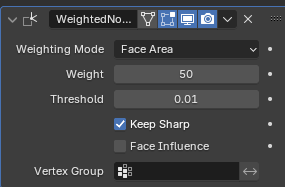
Arma doesn't like objects that are too sharp, so just go to your LOD --> modify --> Normals --> Weighted Normal.Then click on “keep sharp” and apply this to your LOD.
Creating Multiple LODs
Use a mod for LOD separation if desired. Select LOD0 → LODs Maker → Make Lod Object.Creating Colliders
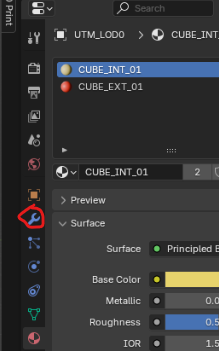
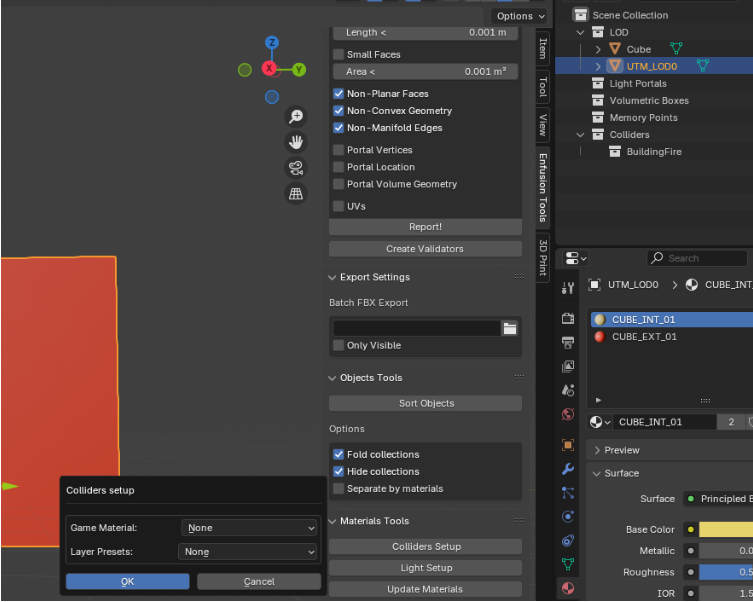
Duplicate your LOD0 mesh in Object Mode (Shift + D). Rename itUTM_LOD0, try to add an DECIMATE effect on it to reduce a bit some detail in order to make lighter collider (blue wrench)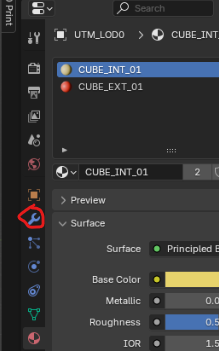
go to Enfusion Tool → Colliders Setup to set:- Game Material: Collider material type.
- Layer Preset: Specify whether it’s a building, prop, etc.
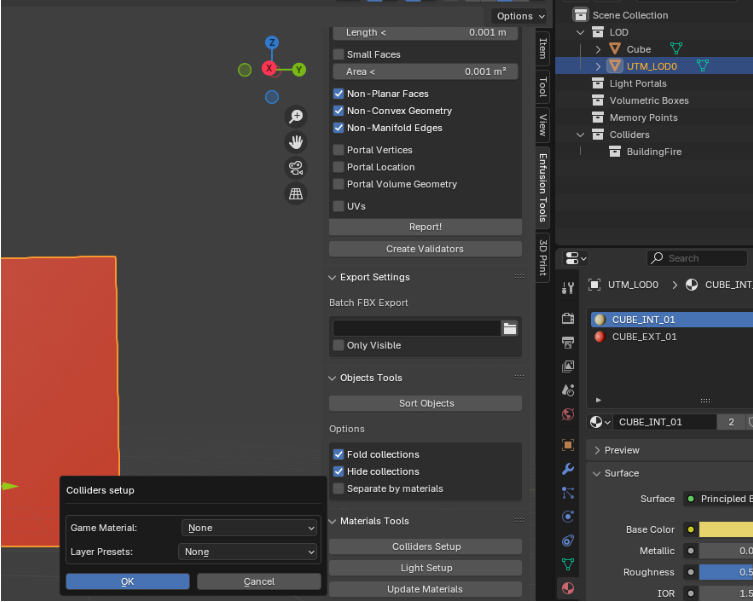
- Creating an Occluder
Create a cube, place it against a solid wall, apply dummyvolume, and rename itOCC_n. Select Sort Object.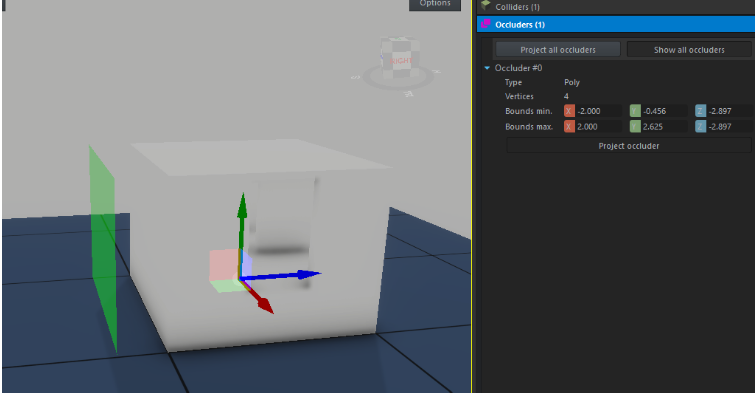
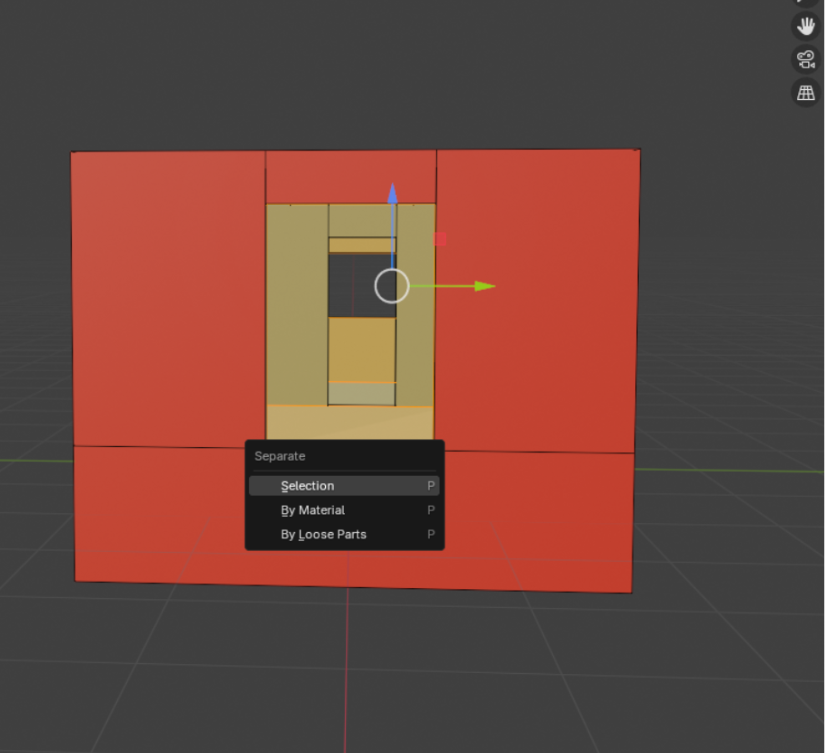
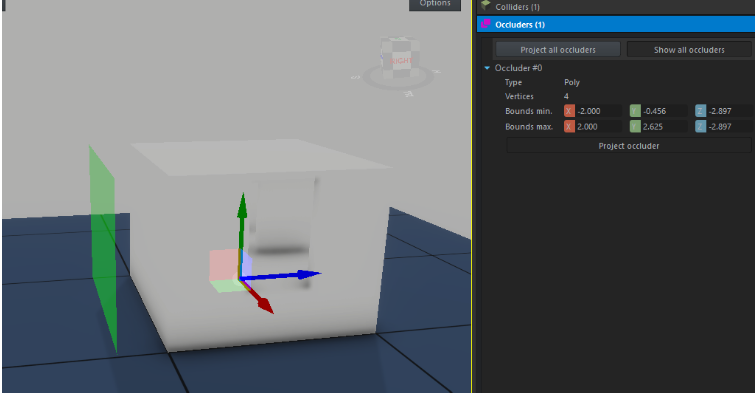
You will need to do this operation only on the face that are closed (non windows and door)
Export, Import, and 3D Testing
Only once all steps are completed, you can export your building: go to File → Export → FBX → Check Custom Properties. Open the Enfusion tool and import it!
PRO TIPS:
- Keep the directory structure consistent between assets and prefabs, for example, ASSETS → Template in assets should match PREFAB → Template in prefabs.
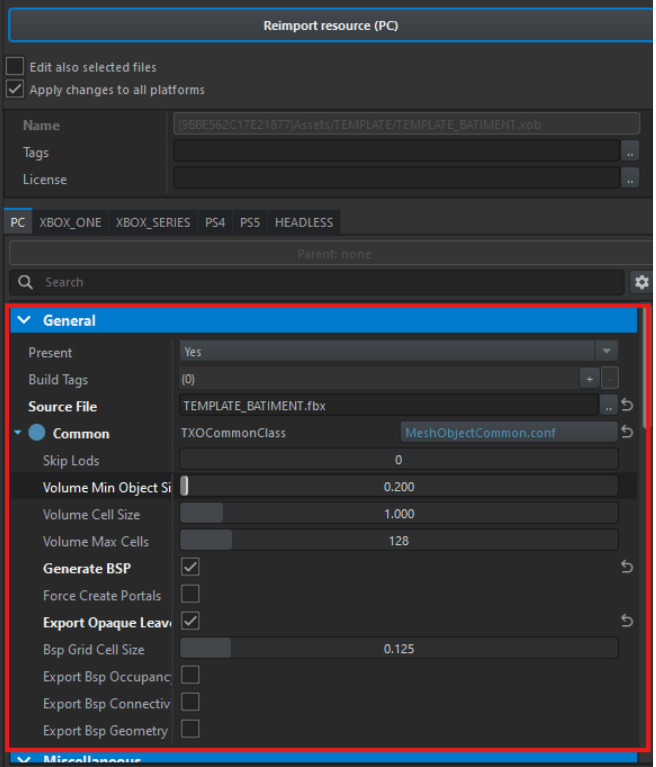
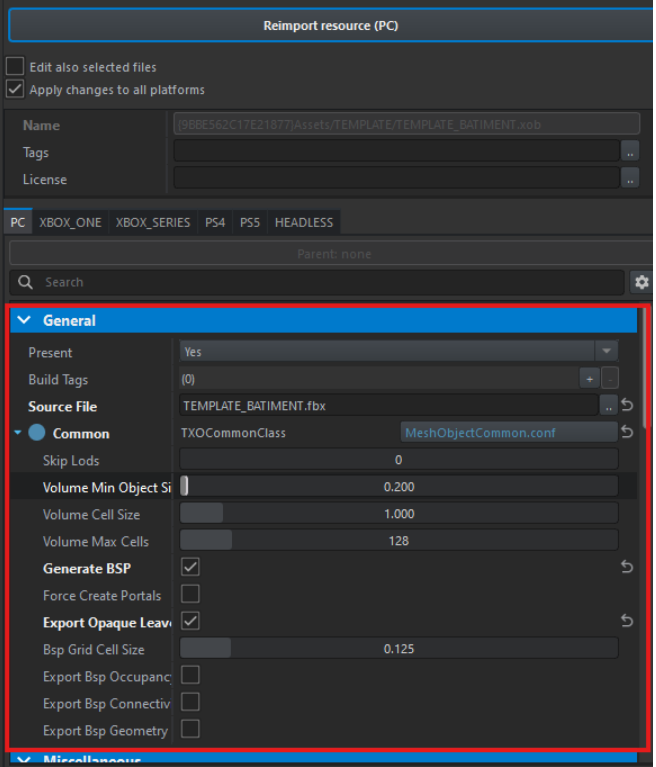
Once imported, select the XOB and adjust the following properties:
- General → Source File → Select your FBX
- Check Generate BSP & Export Opaque Leave
- Uncheck Merge Tri Meshes if you have multiple colliders
- Click Import
PRO TIPS:
- You’ll see the texture emats, dummyvolume, and portals.
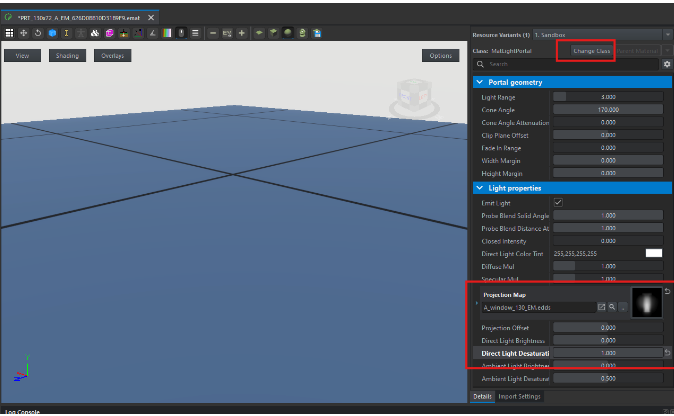
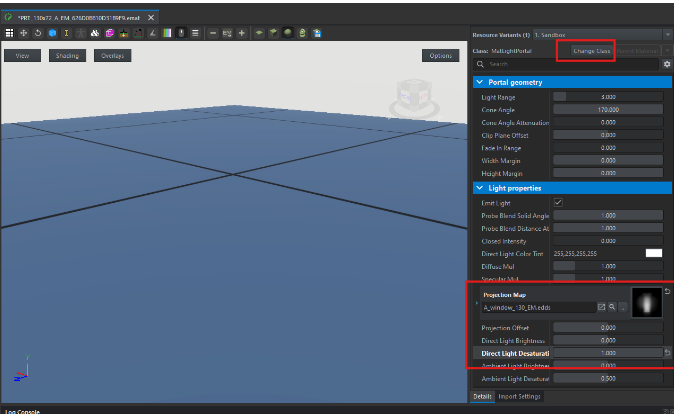
- After importing the emats, update the portal emats:
- For each emat starting with
PRT_*, change its class to MatLightPortal. - In Projection Map, select the correct portal based on the frame.
- Set Direct Light Desaturation to 1.
Your 3D model is now ready! Now, it’s time to texture it.
- For each emat starting with