Mapping (terrain creation)
By Casseburne (Zimnitrita Team Leader) & a little bit by MOONLGHT
tutorial for terrain creation with a bunch of technic on how to do specif action link the terrain
The chapter is bilingual, so use a translator to switch from French to English or vice versa.
- Advise before create a new map
- 1. Create a new world
- Working with multiple people on 1 terrain
- Introduction and Software required
- Gitea configuration and user permission
- Cloning the repo in github desktop
- Add the project to Enfusion Workbench
- Import info and rules to work with sync (avoid push problem)
- Send the work
- Terrain modification (avoid loosing modification)
- Paint with mask
- Why this tutorial
- Warning
- Overview of the Process
- Creating Masks with Polylines
- Exporting Polylines in SVG Format
- Importing the SVG into GIMP
- Importing Existing Enfusion Textures into GIMP
- Importing the Modified Surface Mask into Enfusion
- Updating the Satmap
- Updating Sources
- Navmesh bug
- What are occluders, and do I need them ?
- Sound Map
Advise before create a new map
Introduction
Créer une vrai bonne map est un processus long et sérieux, exemple avec la carte Zimnitrita de Casseburne, cette carte est en développement depuis 2022/2023 environ (PS: Ce tutoriel a été écris début 2025 et a savoir qu'il y a/eu plus de 9 contributeurs actifs en quasi simultané).
Pour la faire simple et à l'échelle d'un nouveau projet, il vous faut du temps, de la motivation et de la discipline. Et une idée de ce que vous voulez faire ! Mettez sur papier, dessinez, écrivez, bref garder une trace écrite de vos idées, même les plus tirés par les cheveux. Quasi tout est possible sur Enfusion.
Faire une map est un bon moyen pour apprendre les bases du Workbench ! Je recommande aux nouveaux développeur de rejoindre un projet de map pour apprendre les bases sur le workflow notamment
1. Create a new world
Preliminary steps (important, readme)
Download real life topology data & satellite map before create map project
ENFUSION project & map entity creation
1. Créer un projet
Commencez par créer un nouveau projet Enfusion:
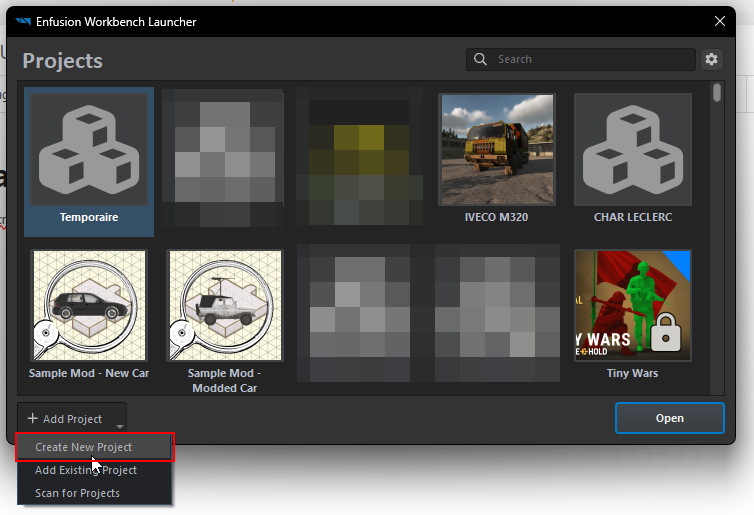
Nommez le et définissez sa position sur votre ordinateur:
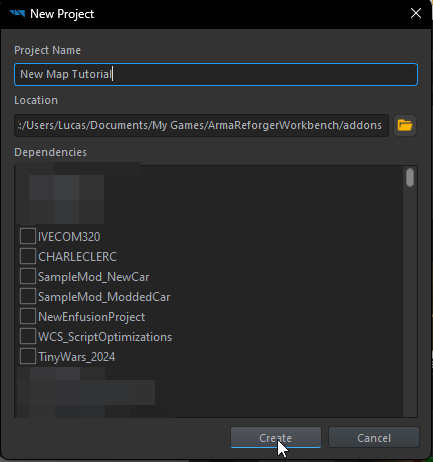
A propos des dépendances: Evitez d'ajouter beaucoup de dépendances (max 4-5) Parce que si une d'elles devient inutilisable a cause d'une mise à jour, votre map ne sera pas jouable correctement.
Enfin, cliquez sur « Créer » pour créer le projet.
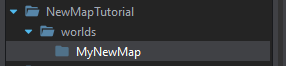
Créez tous vos dossiers et lancez le World Editor:
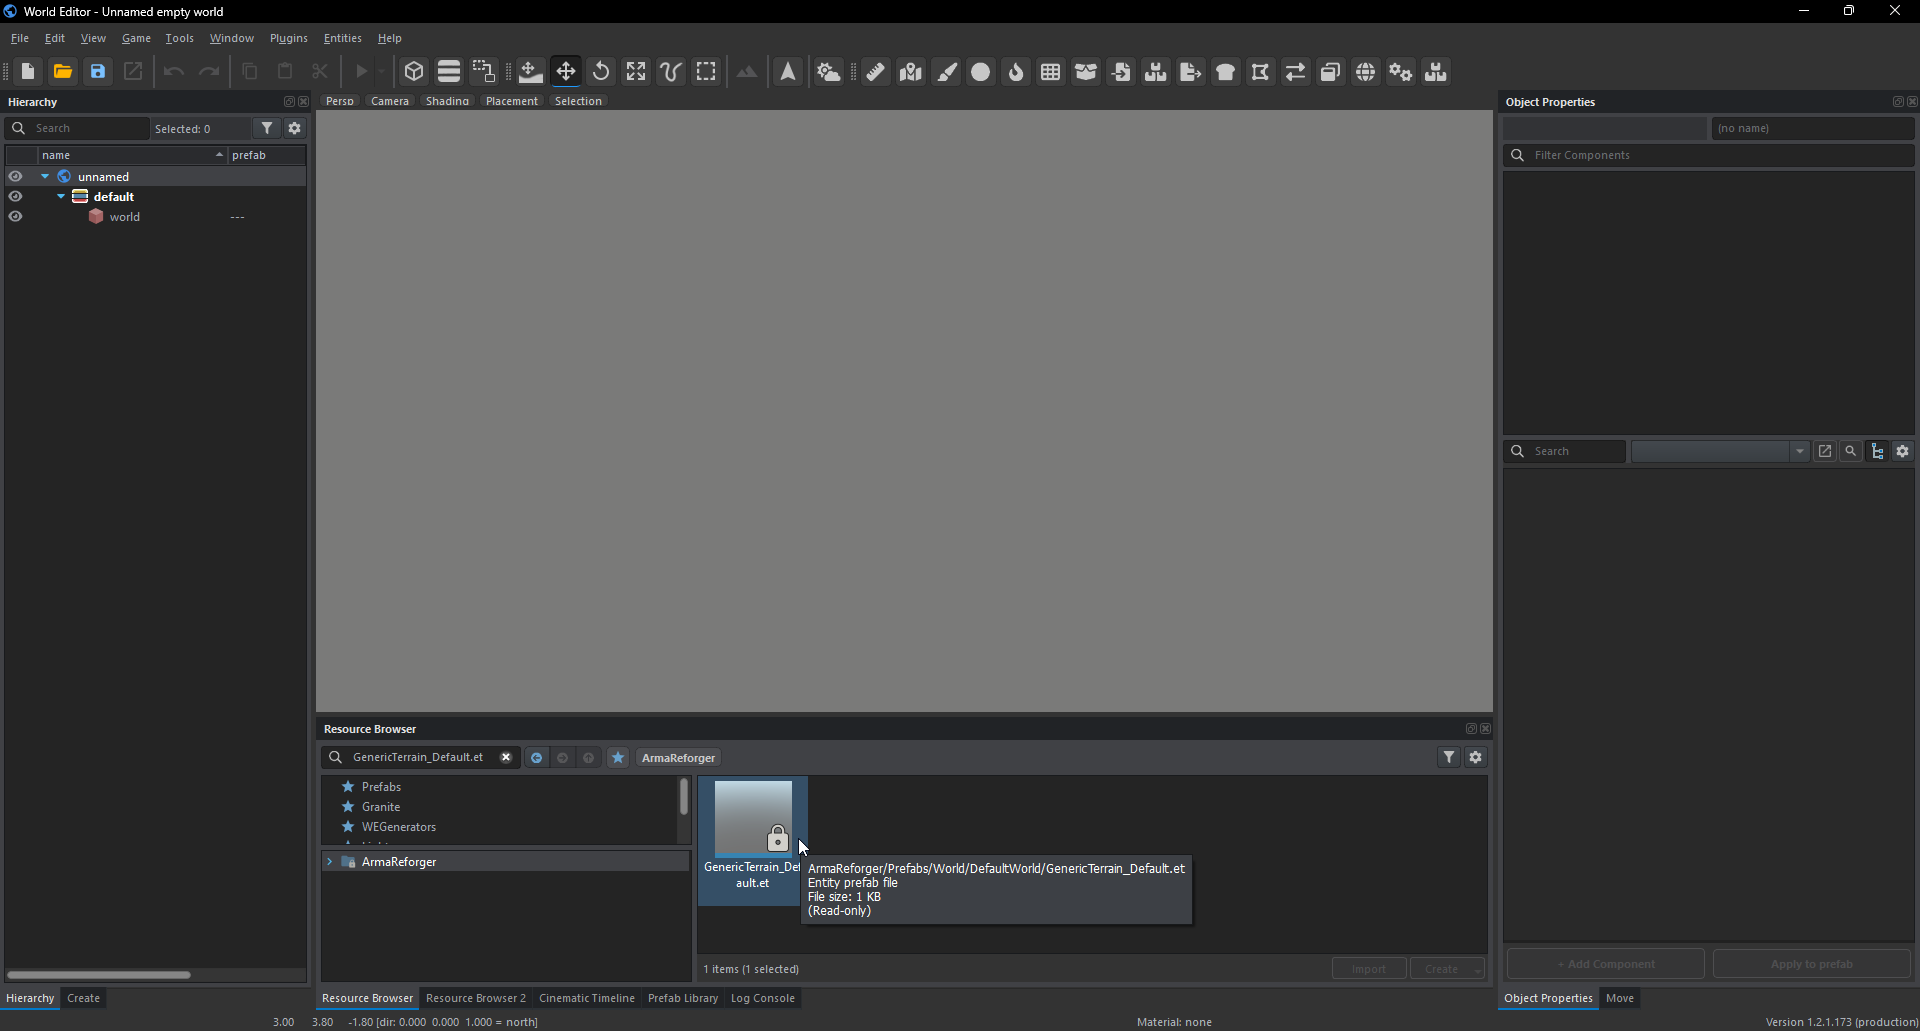
2. World Editor simple overview:
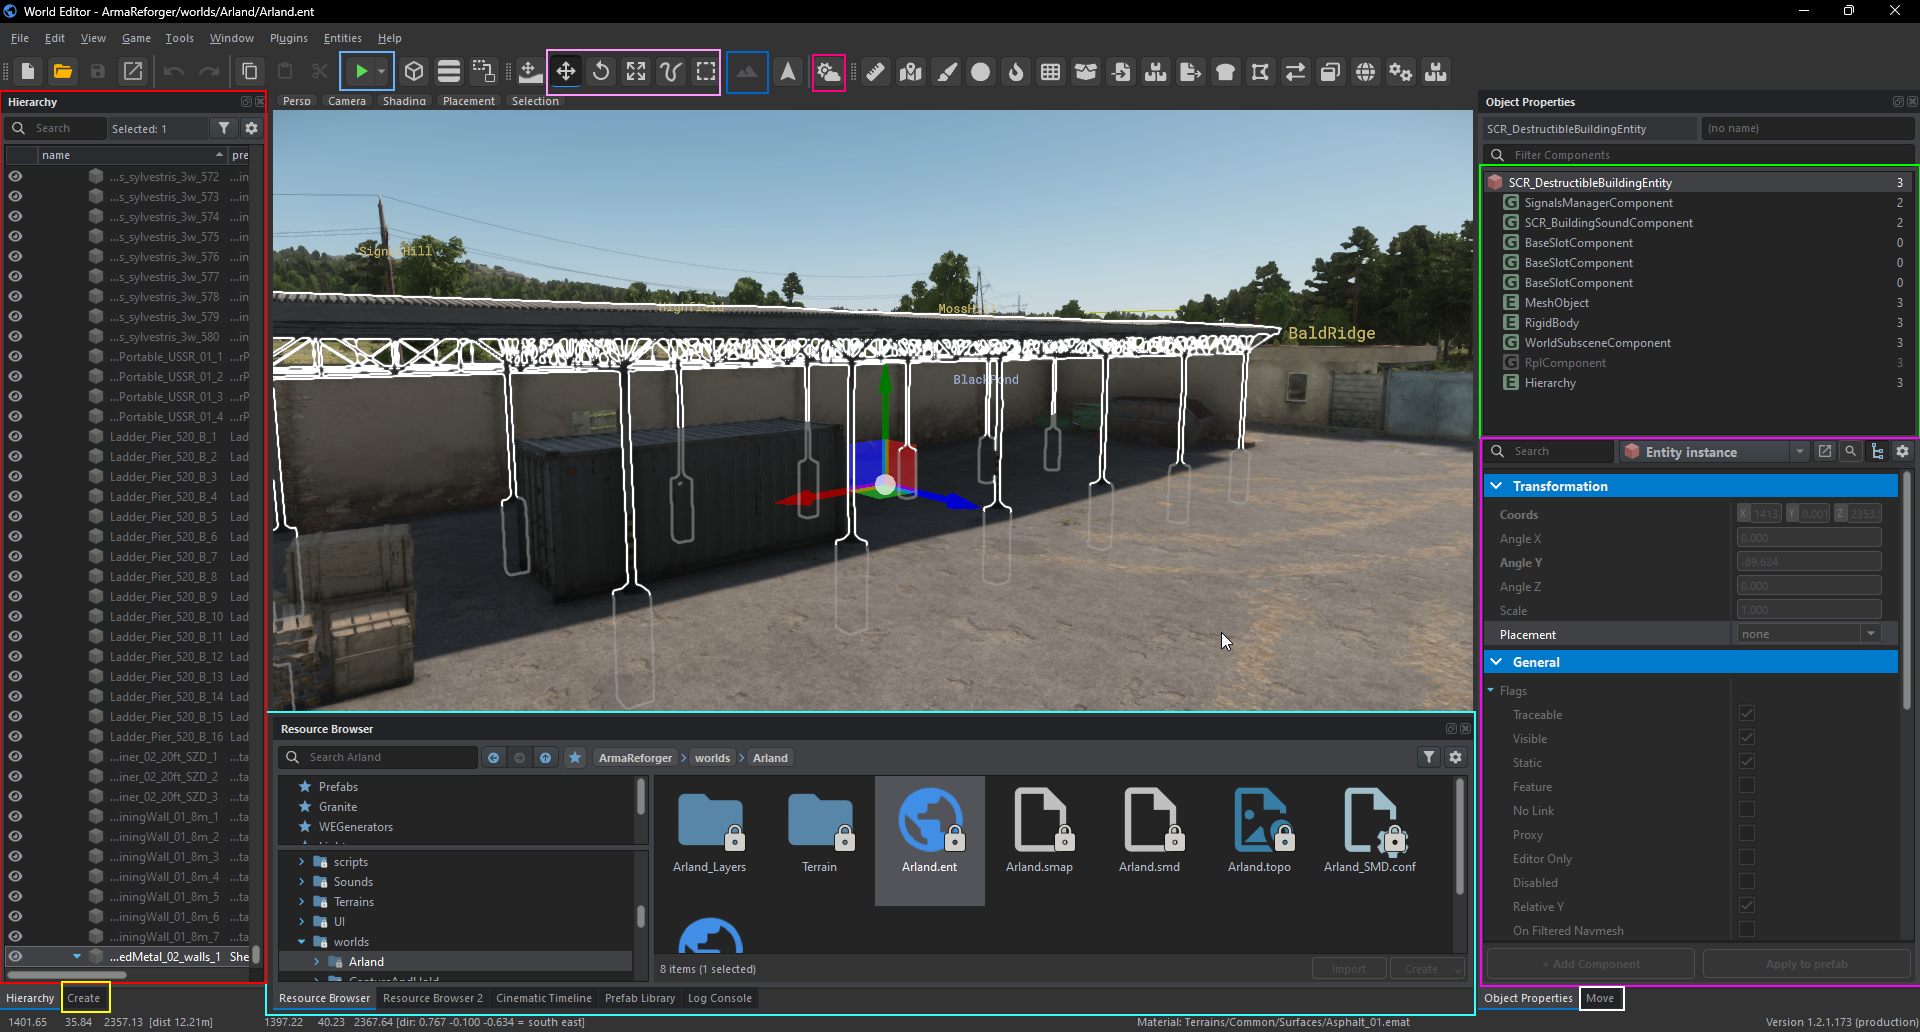
(Map d'exemple)
En rouge, vous avez la fenêtre de hiérarchie : Cette fenêtre contient toutes les entités placées sur votre carte, et vous pouvez rechercher des types d'entités spécifiques.
En jaune, vous avez le bouton Créer [une entité] : Ce bouton sera utile pour la suite du tutoriel.
En bas, vous avez le Ressource Browser : Il nous permet de placer des objets (Préfabs) sur notre carte :
- Attention à ne placer que des préfabriqués avec une barre bleu foncé en bas, ne pas placer de .xob /!\ Ces objets n'auront pas d'autre comportement que d'être visibles.
- Ne pas placer de préfab avec l'annotation « base » à la fin de leur nom.
- Il existe des préfabriqués « éditables ». Ils peuvent être modifiés en GameMaster. Ils sont reconnaissables à leur barre orange.
En violet, vous avez les propriétés de l'objet : Ici, vous pouvez modifier les « caractéristiques » des Prefabs (également appelées components). Vous pouvez sélectionner les components dans la fenêtre verte.
En bas, en blanc, vous avez le bouton d'option de l'outil : Permet d'accéder aux propriétés de l'outil sélectionné (moove car j'ai sélectionné l'outil moove).
En haut, en bleu ciel, vous avez le bouton « Jouer » : Vous pouvez jouer sur votre carte en cliquant sur ce bouton (il y a une liste d'options à droite du bouton en faisant clic droit).
En haut, en rose, vous avez les outils principaux.
En haut, en bleu foncé, vous avez l'outil d'édition de terrain.
Et enfin, en haut, en rose foncé, vous avez l'outil Météo.
3. Créer un nouveau monde
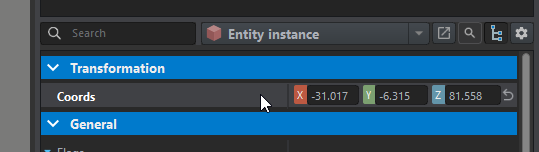
Dans les propriétés de l'objet, fixez les coordonnées à 0 0 0 :
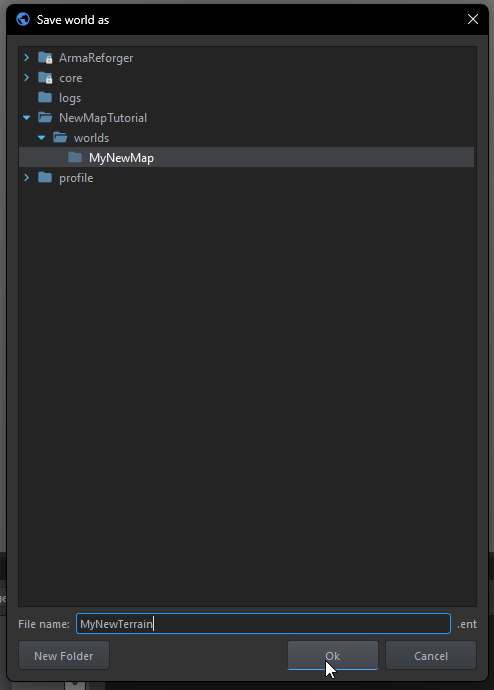
Enregistrez votre monde (Ctrl+S), donnez-lui un nom et définissez son emplacement dans « worlds/[NomDeVotreMap]/ » et cliquez sur Ok :
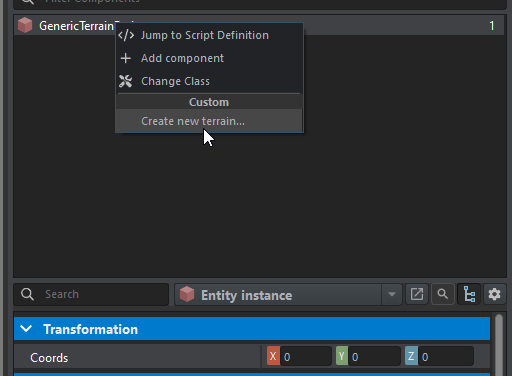
Dans la fenêtre du composant, faites un clic droit sur GenericTerrainEntity et cliquez sur « Create new terrain... » :
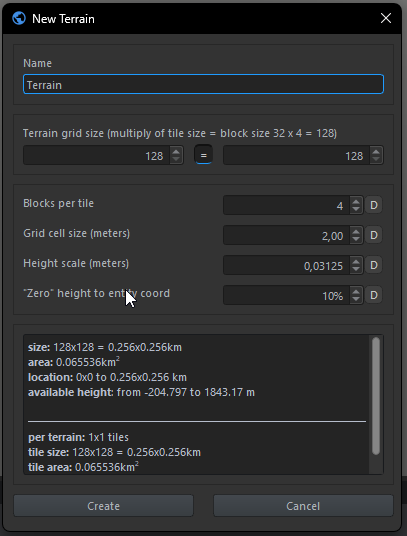
Name:
Nom de votre terrain
Terrain grid size:
Ce paramètre vous permet de sélectionner la taille de votre terrain. Le maximum est de 16384 et le minimum de 32.
Les nombres renseignés doivent être pairs et divisible par 32.
Blocks per tile:
Ce paramètre vous permet de sélectionner la taille de la grille de terrain. Ce paramètre correspond au nombre de faces du terrain en lignes/colonnes. Les faces sont des zones sur votre terrain, vous pouvez par exemple y peindre des textures sur le sol de votre terrain. Dans le coté technique, les faces on un rôle de zone de "sauvegarde" de la position des assets sur le terrain (on peut aussi appeler les tiles des chunks pour une meilleur compréhension).
Le maximum est de 32.
N'oubliez pas que 512 faces correspondent à 513 vertices, ce qui doit être pris en compte lors de l'importation de cartes d'altitude.
Working with multiple people on 1 terrain
this is an exemple of methodologie of work to make big map and have multplie people working on it
this system is use for the zimnitrita map
However Seems that the SVN is a better solution regarding binarize file but its a bit old so we have prefer to host a custom githib
Introduction and Software required
- Install and configure a private git (we are using gitea because of the easy install step) (admin part)
install gitea with portainer: https://docs.gitea.com/next/installation/install-with-docker
- people need to create an account on the git you created

2. we are using the github desktop software to avoid people working with command line and because it’s easy to use also https://desktop.github.com/

Unfortunately you will need also to create an account on github in order to use their software
https://github.com/signup?source=login

Gitea configuration and user permission
Add people to the repository of the map (admin part) (add people in the Mapper teams in order for them to have access to the map)

After being add people will get access to the repository
so they can clone the url of the online repository

Cloning the repo in github desktop
Add this url inside the github desktop software

you will have to add the credential you have create for your private git (step 2 of this tutorial)

Wait for the cloning to be over
Add the project to Enfusion Workbench
Inside the workbench you will have to add the repository you've just download

Make a rule and explain to everybody that they have to work inside their tilt and also have a personal layer

Import info and rules to work with sync (avoid push problem)
Once they have finish their work and wanted to push their work they absolutely need to fetch and pull the update from the repository in you private git to avoid any conflict

This represent 95% problem with sync so please be carful
Send the work
Prepare the sending of your work
you will need to give a name to your commit

send your commit to the repository in order for the other mapper to have the update

Terrain modification (avoid loosing modification)
Exception case on modifying terrain
terrain wont work like the props layer because it is considering as one layer and everyone will erase the work of the other if they don't work in tiles
In order to work with tile i suggest you to make a screenshot and try to make some rule on who works on which tile

To see the tile in the engine go to the the terrain tool and place the cursor in center of your screen
You can also use the debug mode to see each limit of tile (kinda like the F3 in minecraft to see chunk border)
- to open the debug menu make windows key + alt / or windows key + left control
go to render menu with the up and down arrow key and enter with the right arrow key
to display will need to follow this patch: render -> terrain menu -> tiles bonding screen


Paint with mask
No, this isn’t about painting in a costume! It’s about applying textures to the terrain without using the Paint tool in the World Editor, by using texture masks instead.
By Tanin69
Why this tutorial
There are several cases where this process is beneficial, either to save time or because there’s simply no other way. Here are a few typical scenarios:
- Creating Geometrically Perfect Textures:
Some areas, like airports, require nearly perfect geometric surface textures. Airport ground textures, for instance, are usually composed of geometric shapes.
- Mass Texture Generation:
If you need to create large areas without manually painting each one individually, like agricultural field checkers, this process is invaluable. Doing this by hand over half your terrain would be a massive task!
- Specific Road Textures:
For textures under road generators, especially for “runway” types, the standard road generation method (exporting surface masks, generating the satmap, importing with “generate roads” enabled) doesn’t support this particular texture type. Unfortunately, there’s currently no straightforward way to draw perfectly geometric shapes with the Paint tool. If I’m wrong, please correct me!
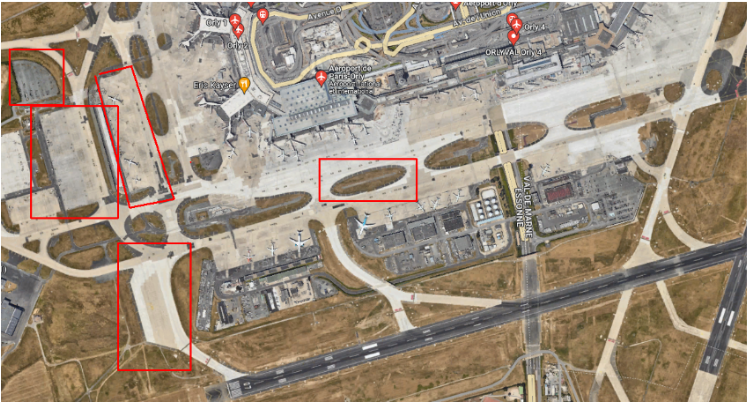
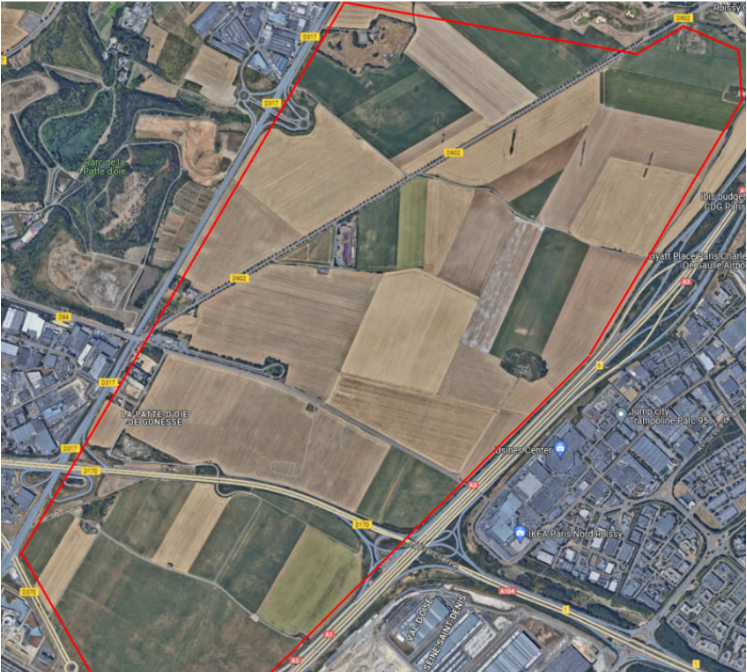
In these cases, the “least bad” solution is to work with surface masks.
Warning
Please note, this is the “least bad” solution I’ve found so far, as it has a significant drawback: it requires re-importing one or more surface masks, which usually modifies tiles you didn’t intend to change. This has two side effects:
- Material Limit Errors: When importing a surface mask, you may encounter errors related to the material limit per tile. In our current project, this affects dozens of tiles, sometimes even over a hundred.

- Only click “Yes” if you’re fully aware of what you’re doing!
- Satmap Regeneration: To clearly see the result of your work, you’ll need to generate a new satmap and re-import it. This, too, will modify all tiles. If you’re working alone, that’s fine. But if you’re working with others, you’ll be modifying your colleagues’ tiles (specifically their textures), which is highly discouraged and could potentially ruin their work.
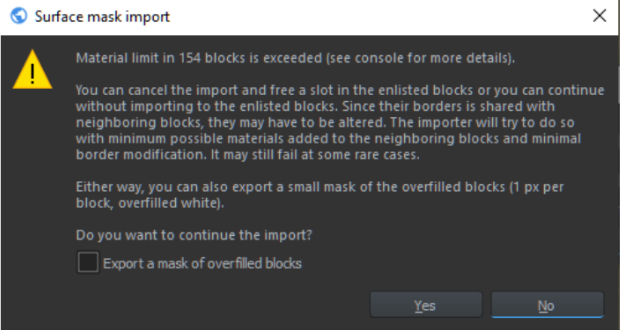
We’ll cover how to work around these issues later, but this involves multiple steps with significant calculation times. If you’re working with an older graphics card or have a slow connection, be prepared for lengthy processing times (generating a new satmap, for instance, can take several minutes to even an hour).
Overview of the Process
- Define Texture Zones with Polylines:
Use polylines to outline the areas where you want to apply textures. - Export to SVG:
Export these areas as an SVG file. - Import SVG into an Image Editor (e.g., GIMP):
Open the SVG in an image editor and apply two simple transformations, in a specific order. - Modify the Surface Mask:
Import the surface mask into the image editor, make the necessary adjustments, and export the updated mask.- If working solo, make a backup of your project before proceeding!
- If working with a team on a remote repository, follow the guide carefully to ensure smooth collaboration.
- Import the Mask into Enfusion:
After all modifications, import the updated mask into Enfusion. - Generate and Re-import the Satmap:
Generate a new satmap to reflect your changes, then re-import it. - Update Sources with a Semi-Manual Process:
Apply only the modified tiles, preserving your teammates' textures by avoiding overwrites.
Creating Masks with Polylines
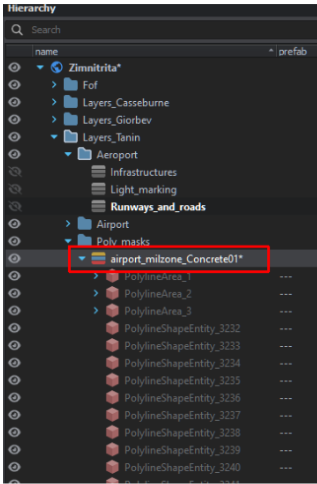
To create masks, define all the areas with polylines for which you want to generate texture masks. Then, export these polylines in SVG format. It’s helpful to create a dedicated layer for this purpose, as you’ll need to select only the specific polylines to export.
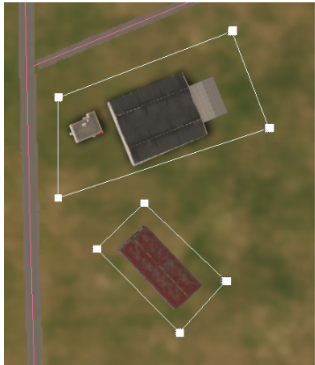
Example: I need to cover certain areas with the Concrete01 texture.
- First, I create a new layer and place all the export-ready polylines there.

- Then, I draw the polylines, adjusting their colors as needed to differentiate them.

Tips
- Creating Polylines from Existing Splines or Polylines:
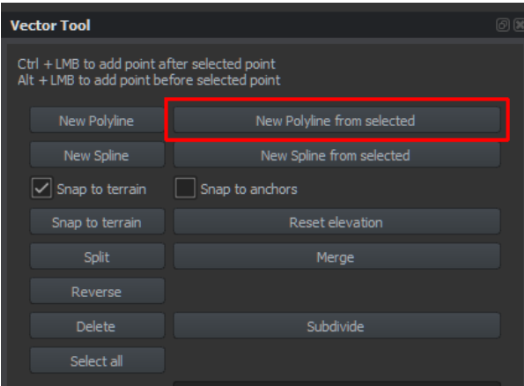
- Switch to the Vector Tool, select points from an existing polyline or spline.
- If you want to select all points, use the Select All button.
- Click New Polyline from Selected to create a new polyline from the selection.

- Creating Rectangles, Squares, or Circles:
- Start by creating a polyline with at least two points.
- Convert this polyline into a Polyline Area.

- Experimenting with Parameters and Buttons:
Adjust parameters and explore available options to get the desired results.

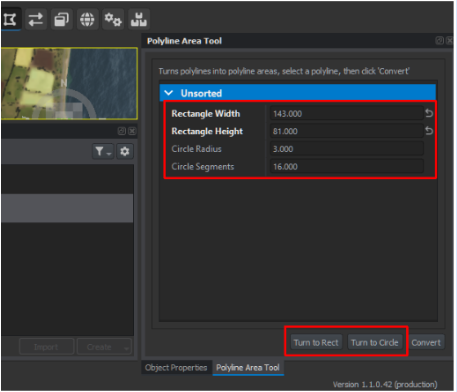
Examples of Results: This technique isn’t limited to creating masks; it can also be used for roundabouts, soccer fields, etc.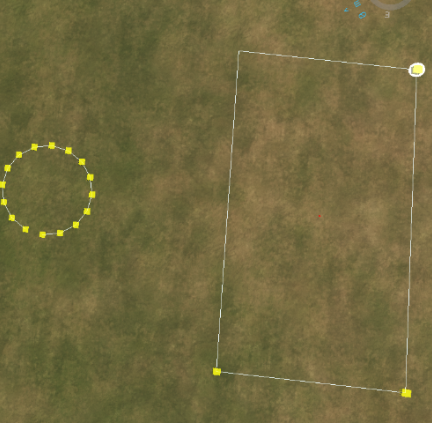
Limitation
Currently, I haven’t found a straightforward solution for creating masks for curved runway generators. After all, who needs curved runways, right? 😂 The default road generator lacks a Concrete (non-transparent) material, so until someone develops it, the only workaround is approximating curved roads with carefully placed polylines.
Exporting Polylines in SVG Format
- In the hierarchy, select the polylines you wish to export.
- Click on the Export Geographic Data tool.
- Choose the appropriate options and click Export.


Note: With this setup, the generated file will be named
export.svgand saved in the profile folder within your default Workbench directory.

Importing the SVG into GIMP
Important: SVG exports are not exactly the same size as the surface masks. To avoid misalignment between the SVG masks and Enfusion’s surface mask, follow these steps in the exact order:
- Import the SVG into GIMP.
- Apply a vertical mirror transformation to the image.
- Resize the image to match the exact dimensions of Enfusion’s surface masks.
After completing these steps, you can continue working in GIMP without alignment issues.
Importing Existing Enfusion Textures into GIMP
For those familiar with surface masks, this process will be straightforward. If not, I recommend watching this video: Surface Mask Tutorial.
- Export the Surface Mask corresponding to the texture you want to modify.
- Import this mask into GIMP. I recommend adding it as a new layer in the SVG image you previously imported, but there are other methods as well.
- Modify the Mask:
- The main task is to paint white over the areas of the surface mask layer that correspond to the SVG mask layer.
- My approach:
- On the SVG layer in GIMP, select all painted areas.
- Switch to the surface mask layer.
- Paint the selected areas white.
- Export the Image as PNG: It’s highly recommended not to overwrite the original Enfusion mask, so you can revert changes if needed. Use a clear naming convention for your modified mask, e.g.,
Concrete01-mod1.png.
Importing the Modified Surface Mask into Enfusion
Warning: Importing the texture mask will modify all tiles and will likely trigger errors (see the previous warning). If you’re working alone, be sure to make a backup of your terrain before importing the mask.
If you’re working in a shared environment with a remote repository, you’ll need to retrieve the latest repository state and perform a “semi-manual” update (explained in upcoming steps).
- In Enfusion, import the modified mask file (e.g.,
Concrete01-mod1.png) into the appropriate texture slot. - Repeat as Needed: You can repeat these steps as many times as needed to refine your texture adjustments, smoothing, shapes, etc. However, before re-importing a modified texture, it’s recommended to first import the base texture of your terrain to reset previous changes (e.g., in our project, we use the
Grass03texture as the base).

This will help keep previous modifications clean and maintain consistency across your terrain.
Updating the Satmap
It’s hard to accurately assess the results of these modifications without generating a new satmap. Since we’re working with large areas, a high-altitude camera view is often required, where only the satmap textures are visible. Therefore, updating the satmap is frequently necessary to see the final quality of your work.
Warning: Updating the satmap, followed by refreshing all terrain textures, can be very time-consuming. In our 256 km² project, on a modest setup (like an Nvidia 1060 GPU), these steps take a minimum of 45 minutes
Steps to Update the Satmap
- Export All Surface Textures: Export the updated surface textures.
- Generate a New Satmap:
Our team uses the ReforgerSatGenerator Python script by Daniel Granquist, which has saved us substantial time (a big thanks to him!). - Import the New Satmap: Import the newly generated satmap into Enfusion.
- Save and Wait for Tile Updates: Save your project and wait for all tiles to update, which can take 20–30 minutes on similar configurations.

This update is essential for evaluating how your modifications look across large areas of terrain.
Updating Sources
If you’re working solo, you should have backed up the terrain before the first surface mask import. Simply follow Step 3 to update without overwriting any changes.
If you’re working with a remote repository, follow these steps:
Create a Backup:
Rename your project folder, adding a suffix like -MOD to create a backup (e.g., project_name-MOD).
Retrieve Sources from the Remote Repository:
Initialize the remote repository as if it’s a fresh local setup. For example, using the command line, run:
git init <remote_repository_url>
Copy Modified Files to the Local Repository:
- From your backup (e.g., project_name-MOD), copy the following into the local repository folder you just retrieved:
- The layer you’re working on.
- All modified tile files.
Tile File Locations:
Locate modified tiles in both:
- project_name-MOD\...\Terrain\.Data
- project_name-MOD\...\Terrain\.Editor data
- Copy any files with the tile numbers you modified. For example, if you changed tiles 156 and 157, copy all files containing 156 and 157 from both .Data and .Editor Data directories.
Since this is time-consuming manually (each tile has eight associated files across two folders), I recommend using a Python script to automate the process.
- Update and Push Changes:
Once the files are copied, update your local repository and push the changes to the remote repository.
This ensures only the intended tile modifications are uploaded without affecting the work of others in your team.
Navmesh bug
If you try to set a new navmesh and it doesnt save your modification
you need to duplicate the base prefab before place it in your world otherwise you wont be able to modfy the base prefab
Bug with IA not being able to jump or open the door:
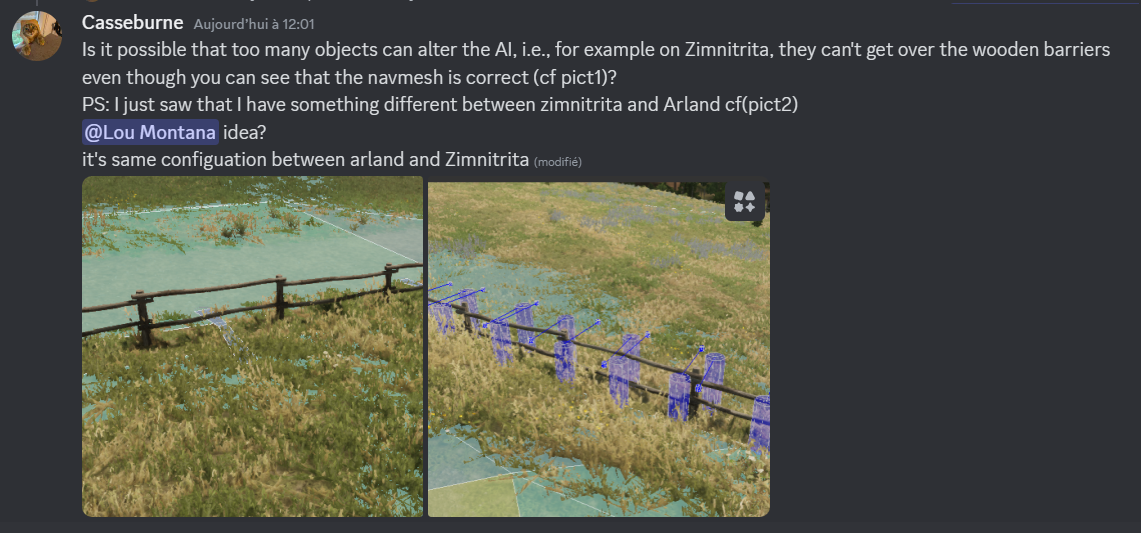
The solution was to click on the save whole navemesh rather than the save navemesh
What are occluders, and do I need them ?
Basically, occluders are invisible volumes in a scene that hide everything behind them.
They are used for occlusion culling, a rendering feature that hides occluded objects to save performance.
In Enfusion, you can meet occluders in 3 basic forms:
- Terrain Occlusion
This is the most important form of occlusion culling.
It ensures that all objects which are completely hidden by terrain (for example, because they are behind a big hill) do not have to be rendered by your GPU, resulting in an FPS increase.
Since Enfusion now has an automatic terrain occlusion system, you do not have to enable terrain occlusion yourself.
However, when creating a terrain, terrain occlusion can still be an important thing to consider: A hilly landscape will usually be more performance friendly than a completely flat one, because hills will occlude many objects. - Manual Occlusion
Before automatic terrain occlusion was a thing, we had to set up occluders manually using WorldOccluderEntities. These were volumes placed in the world, usually within hills, to achieve the same effect as described above.
Today, these are not just no longer necessary, but also broken and won’t do anything.
update (november 2024)
seem that bohemia abandoned the manual occlusion object, for the model occlusion to be able to place down a manual oclusion you will need to create a ghost model (bacon help me to create one and have successfuly test it)
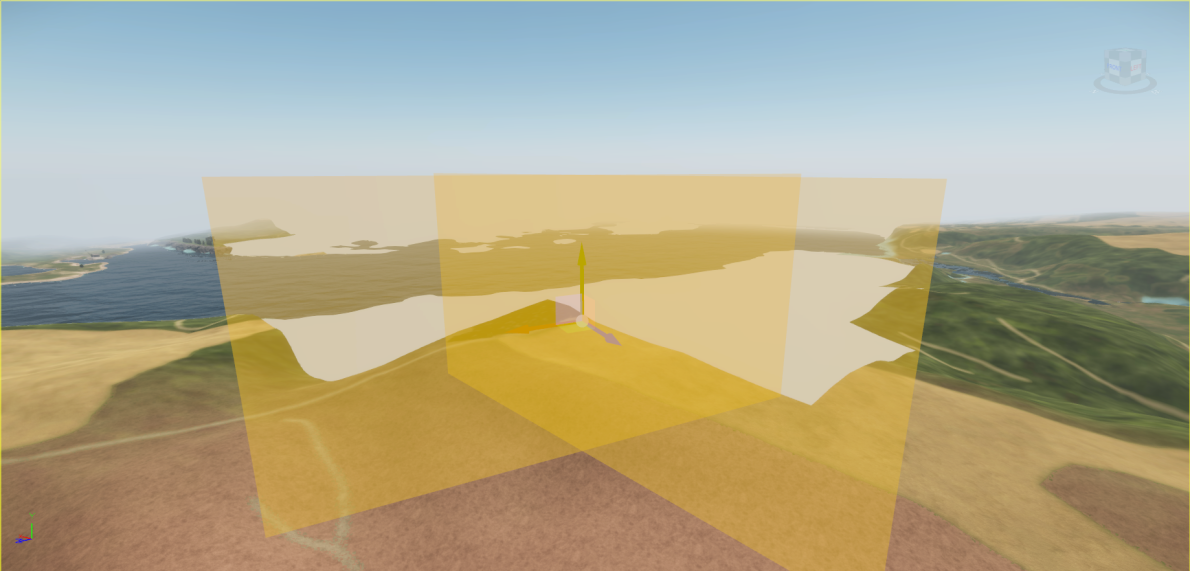
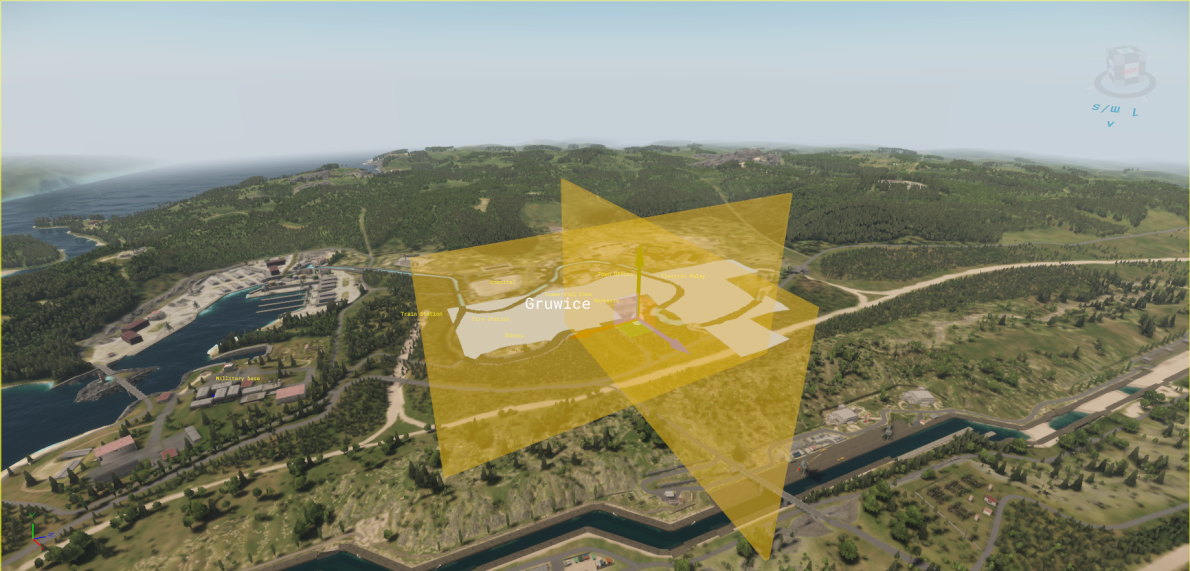
here the model from bacon:
occluder_1kx500mx10m.fbx- Model Occlusion
When importing custom 3D models such as buildings from Blender into the Workbench, you can set up model occluders.
These are volumes placed e. g. within large, opaque walls of houses, resulting in occlusion of what is behind these walls.
This can help with performance especially in urban areas, which may lack other sources of occlusion.
Instructions of how to create them can be found here. If you open up XOBs made by BI in the Workbench, you will also find some good examples.
While not essential for practical application, if you want to improve your technical knowledge on occlusion culling, I highly recommend watching this video.
Sound Map
by: The Atlas 2: Arma Reforger
Create the sound map
- Save your work
- In Resource Browser, do a search for AmbientSounds_Everon.et or AmbientSounds_Arland.et
- Drag one of them into the main preview window
- In Resource Browser, do a search for SoundWorld_Base
- Drag it into the main preview window
- Select the Export Map data tool
- Click the .. button next to Destination Path
- Select your Terrain folder
- Next to Type, select Soundmap
- Press Export
- Select the SoundWorld_Base entity
- In Object Properties, go to where it says Soundmap and press the .. button next to it
- Locate and select your soundmap (terrainName.smap)
- You might need to restart the entire workbench to start hearing it