General Information about Workbench
general information regarding the enfusion engine and the Worbench Tool for arma reforger & A4
- Warning - How to Save Your Work and Correctly Use Enfusion Prefabs
- Create a new projet
- Import information and advice
- Prefab Arma Reforger System
- Enfusion Workbench Tips
- About lights, probe and reflection system in ENFUSION
Warning - How to Save Your Work and Correctly Use Enfusion Prefabs
WARNING: In Enfusion, the World Editor is used to edit worlds but also to create or modify prefabs (which is what we’re doing). To modify prefabs, open the Resource Browser, locate your prefab, double-click on it, and click on Edit Prefab. From this point, you can modify your vehicle prefab or anything else (press Ctrl + S to save).
You can also modify prefab parameters by placing them in a world sub-scene. To save your changes, click Apply to Prefab and select the prefab in the window that has just opened.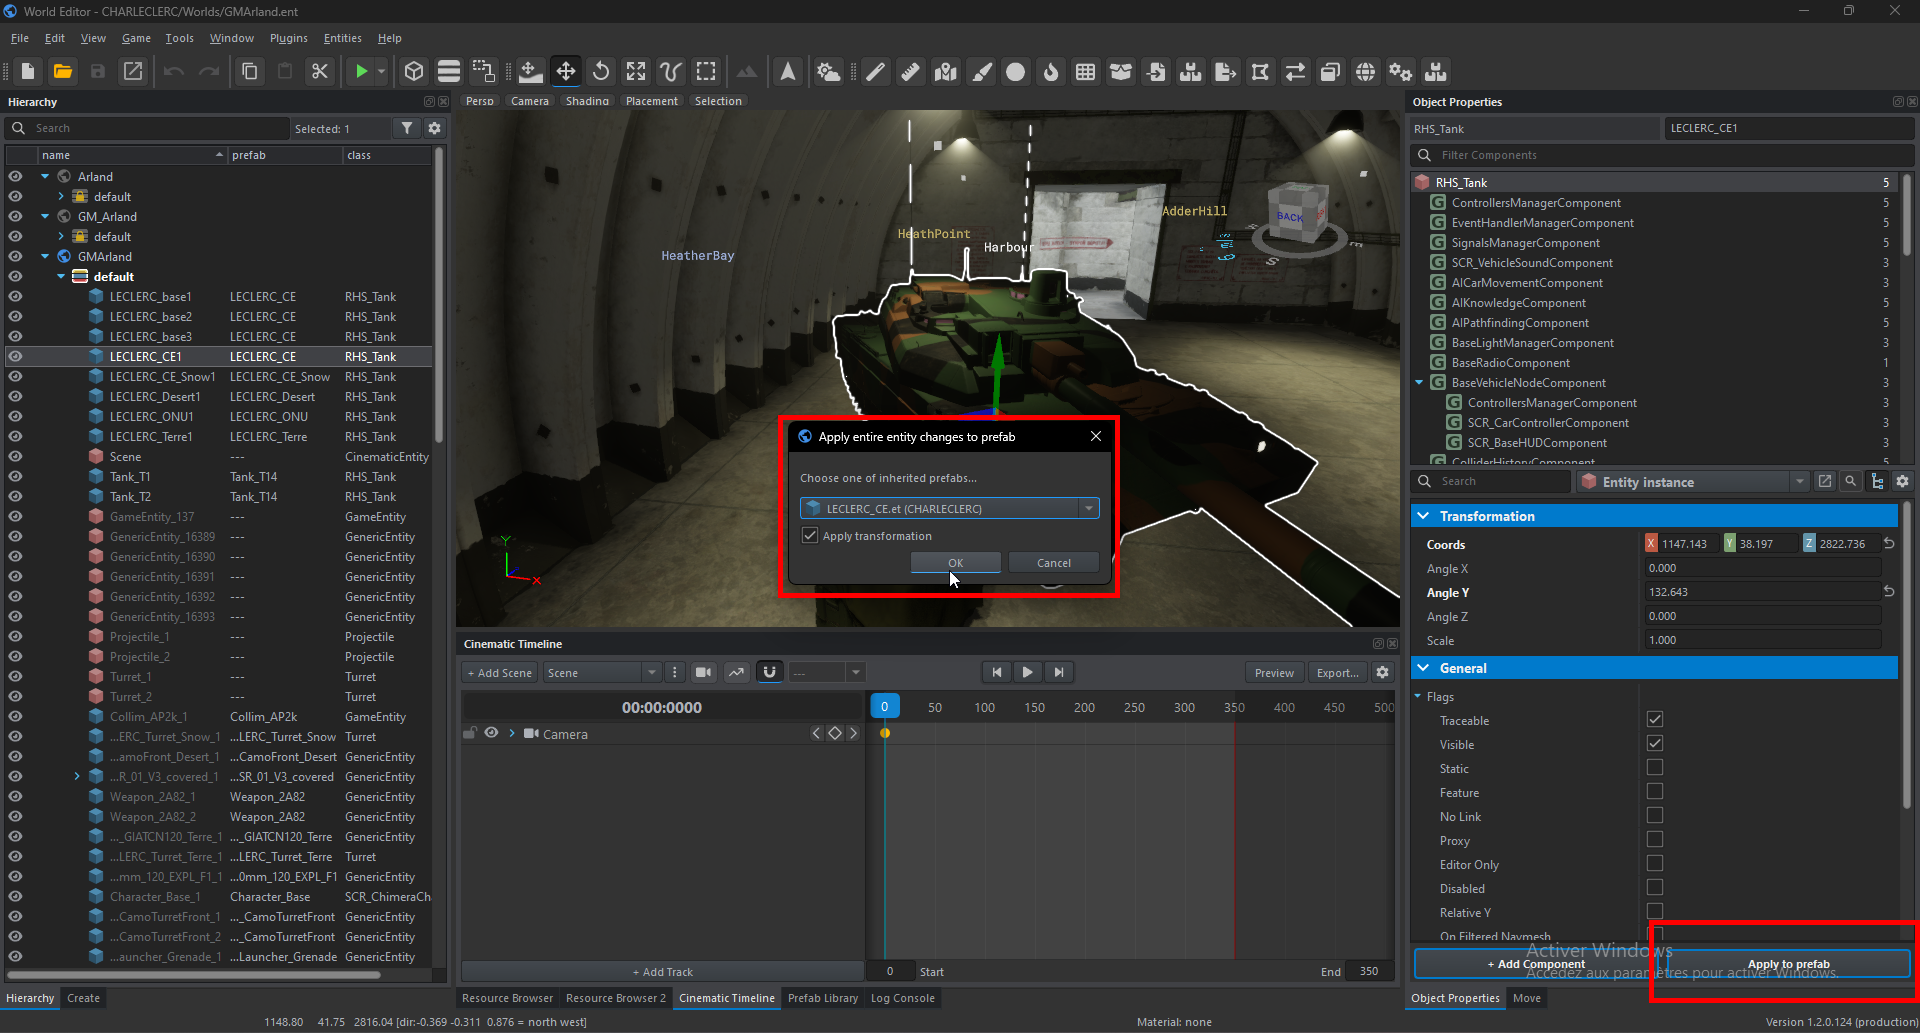
Create a new projet
How to create a new project complying with the rules of art
New Game +
Introduction
Today we gonna see how to create a Enfusion project ! It's look like useless but i've seen a lot of people who don't know how to set-up correctly a projet 👀.
1. Create a new project in Workbench
You just have to do right click and create a new project, a window like that will appear
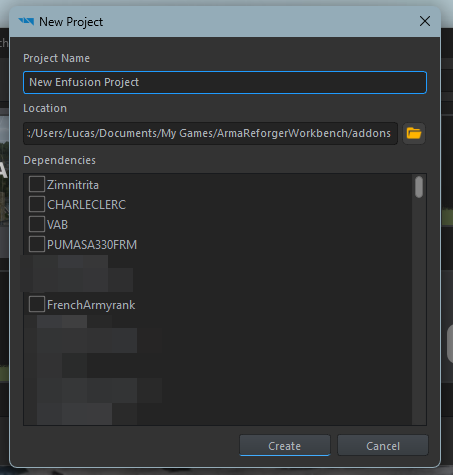
Name your project (for the tutorial, it will be New Enfusion Project but attention, you can't rename a project easly so choose a good name for your 1st project).
Warning: Be careful with dependencies, it can break your addon if Bohemia Interactive publish a Arma Reforger update who will not be compatible with a dependence or if the author of a dependancies decides to delete his addon from the workshop for example.
Once that done, you will see the Workbench main menu !

2. Introducing Workbench
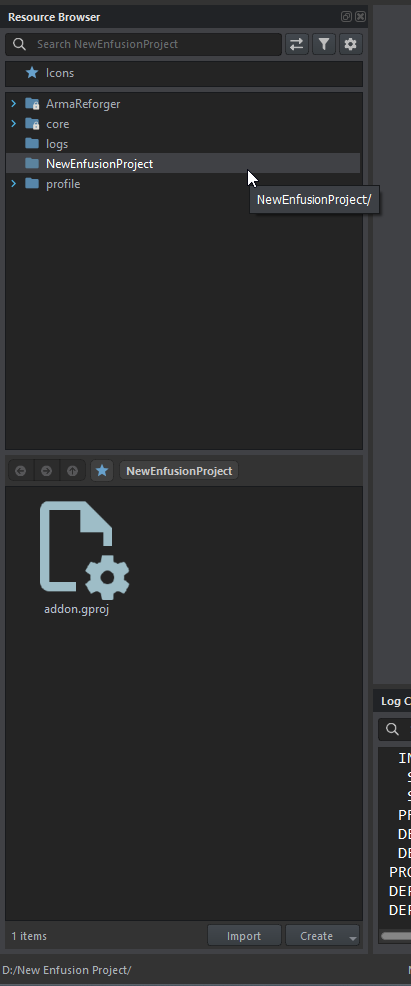
This window is used to find resources from your addon, the base game or from a dependency added at the creation of your project.
You can also open files (like World, image, 3D model...) from here (instead of opening the tool and opening the file from the tool).
In Arma Reforger/Enfusion, the most asset, system, prefab, texture, asset.. can be override or duplicate. For asset in your addon, you can aslo inherit.
Override: Override a asset from an addon or Arma Reforger. Caution, all assets will ride if you override it in your addon so be careful with this functionality. For example, if you override a BTR in your addon for delete all lights, every BTR in game will not have lights.
Duplicate: Duplicate a asset from an addon or arma reforger. Unlike override, duplicate allow you to modify an asset without modify every asset in game. For example, if you duplicate a BTR in your addon for delete all lights, just your BTR version will have no light ingame.
Inherit: Inherit allows you to create a child of your prefab in your addon. For example, if you create a car and you want to do a blue version of it, you just have to right click on your base car and click on inherit, it will create a new prefab and in this new prefab, you will allows to modify the color of your car and if you modify another setting in your base car, that will update your blue version automatically.

Now you have every tools ! So let's see what each one does:
- World Editor: This tool allows you to create a new map and modify yours future prefabs. (See here)
- Particle Editor: Create or modify easly particles.
- Animation Editor: Create, modify or adapt animations projects (high difficulty level in arma reforger, don't start by this).
- Script Editor: Create and modify scripts. Enfusion use C and Enforce syntax (See here)
- Audio Editor: Create and modify audio projects. (See here)
- Behavior Editor: Allows you to modify AI Behavior.
- String Editor: Allows you to create translation table or value string for example. (See here)
- Procedural Animation Editor: Create and modify procedural Animations (See here)
At the bottom, you have the Log Console, you will see here, all of what's appening behind the scenes of the Game simulated by the workbench. You have Errors in red, Warn in Orange and global information in white.

At the top, you have the navigation bar:
Import information and advice
Information about importing 3D models, textures and anything else related to importing files from another platform
What are LODs and why should I add them?
When importing 3D models, you should always make sure to add LODs.
LODs are essentially lower detailed versions of the mesh that get displayed when it is further away from the camera, significantly reducing performance impact.
This is important because even with modern and powerful GPUs, triangle count does absolutely still matter in a major way.
Setting up LODs is easy and takes no more than a couple of minutes once you know how it works. Here’s how to do it:
- First, you duplicate your object in Blender 2-3 times, naming the versions Name_LOD0, Name_LOD1, Name_LOD2 and so on.
- Leave LOD0 the same, but for the other ones, add increasingly aggressive Decimate modifiers and apply them.
For example, if LOD0 has 10k faces, LOD1 might have 5k, LOD2 2k and LOD3 only 500. - Finally, click the Sort button in Enfusion Blender Tools to move the LODs into separate collections.
Some of this info is also described on the FBX Import page.
In addition to regular LODs, you can also add a final MLOD or imposter model, which is basically a super low detail version of the asset, which only has maybe 20-200 triangles and all its detail either baked to a special low res texture, or even just a texture-less material, optionally with vertex colors.
This is not necessary for most models, but worth considering for frequently used ones such as trees.
In the Workbench, you can optionally also adjust the distances at which these LOD switches happen by modifying a MeshObjects LOD factors - more on that here.
you can use automtic LOD maker on blender with some plugin:
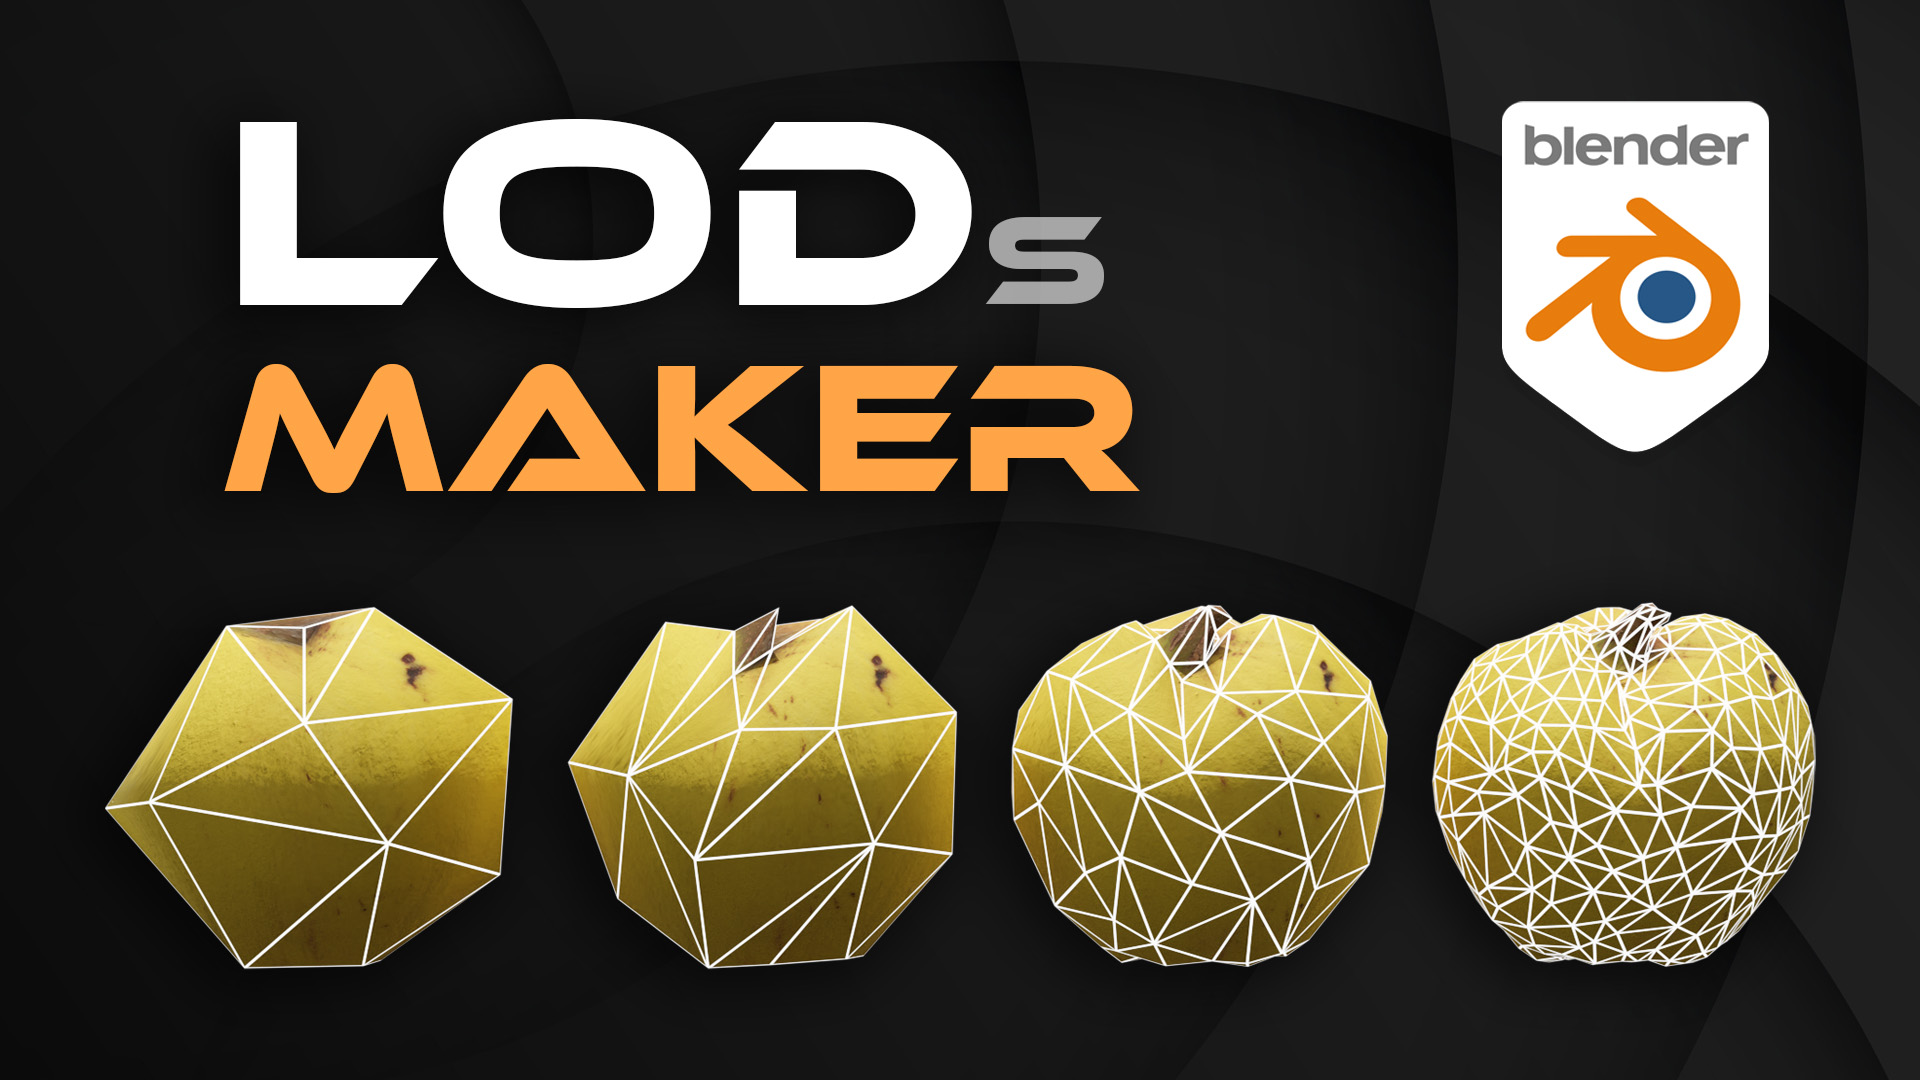
https://blendermarket.com/products/lods-maker--create-level-of-details-in-1-click/?ref=1193
Prefab Arma Reforger System
Learn all about how prefabs work on Arma Reforger and Enfusion
What is the difference between prefab colors?
There are 3 types of prefabs:
Blue []:
Regular prefabs, you'll want to use these for the vast majority of applications.
Pink []:
This is how PrefabLibrary prefabs differ from their blue counterparts:
- They can be placed from the PrefabLibrary, a special resource browser made for placement of common terrain objects.
- Using parameters stored on the pink variant, the Prefab Library can automatically randomize things scale and rotation on placement.
- If you are not currently using the Prefab Library, you can just stick to the blue variant.
Warning: PrefabLibrary prefabs cannot be edited, for example saving changes to an inheriting version will not work.
Orange []:
PrefabsEditable, these can be edited or deleted ingame by GameMaster.
Enfusion Workbench Tips
Simulate Multiplayer (peer Tools) ?
About PeerTool:
PeerTool lets you test your project in MP by launching clients in addition to the host player. It can be configured under “Plugins => Settings” and enabled in the play button options.

Under “Plugins”, there is also the Dedicated Server Tool, which works in the same way, except that it runs a Dedicated instead of a Listen (= player hosted) Server, which is preferable if you’re developing for this environment.
The Executable paths of peer clients and server respectively need to be set to the Arma Reforger and Arma Reforger Server EXEs.
As config class, you should choose DedicatedServerPluginCLI_Server, this is where you can configure the world.
Additional parameters such as “-addons” or “-addonsDir” can be specified under “Params” in both Server and Peers config.
When using the Dedicated Server Tool, you do not have to specify addons using the “-addons” parameter for both Server or Peer, it will load the required dependencies automatically.
https://youtu.be/ZnDVq58vq4k
To change the name in the peertool:

(sources: https://docs.google.com/document/d/19VrUpAId4UGjykBw1rTP375Q9l2udNIEHPhTzqEgrSc/edit?tab=t.0)
About lights, probe and reflection system in ENFUSION
Introduction
Lights and reflection are, in games engines, a very important feature but also a point that is difficult to set correctly to get a nice rendering.
Today we gonna learn how to create a light environnement in a Shelter for example.
We gonna also learn how to correctly place global probe for map creation.
1. Probe creation, placement and configuration
What are probe ?
Light probes are small spherical objects that capture lighting information from the environment:

They are strategically placed in the scene, usually at points where lighting changes dramatically or where objects interact with light. The game engine then uses the light probes to interpolate the lighting of objects not directly illuminated by the light sources. In this way, you can create realistic effects such as indirect lighting, reflections and shadows without having to calculate them for every pixel on the screen.
How are the different type of probe ?
There are three different type of probe:
- Global Placed: Used for map creation, modify every reflection on map environnement
- Global Sky: Used for map creation, modify sky reflection on map environnement
- Local: For buildings or area on your map who don't have a good reflection render (cf. @TODO)
For this tutorial, will only explain how to use Local probe for a building, for learn how to use Global Placed & Global sky probes, see @TODO.
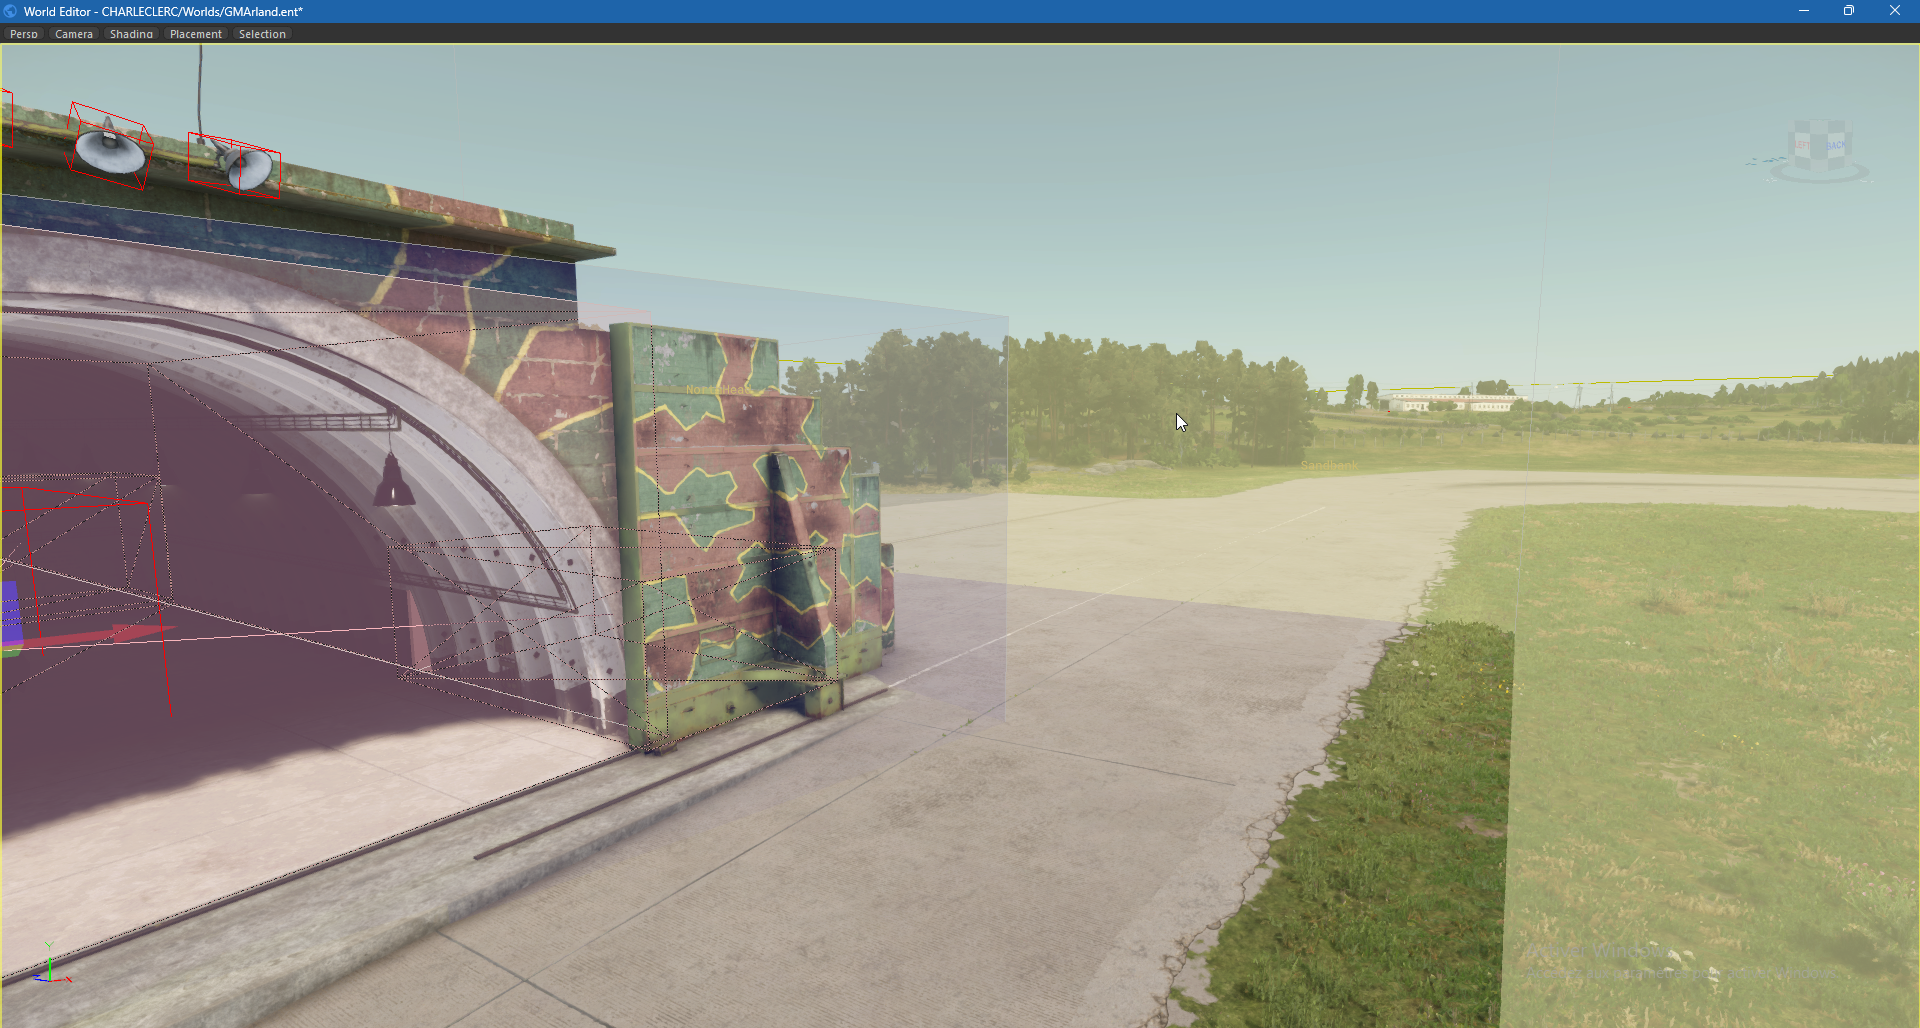
How to create Local Probe ?
Search in ressource browser "ProbeHouse_Base.et" and drag & drop it in into your house, in Hierarchy window:
If the probe is not correctly positioned, the reflection in your building will not update!
And finaly, we have Probe properties:
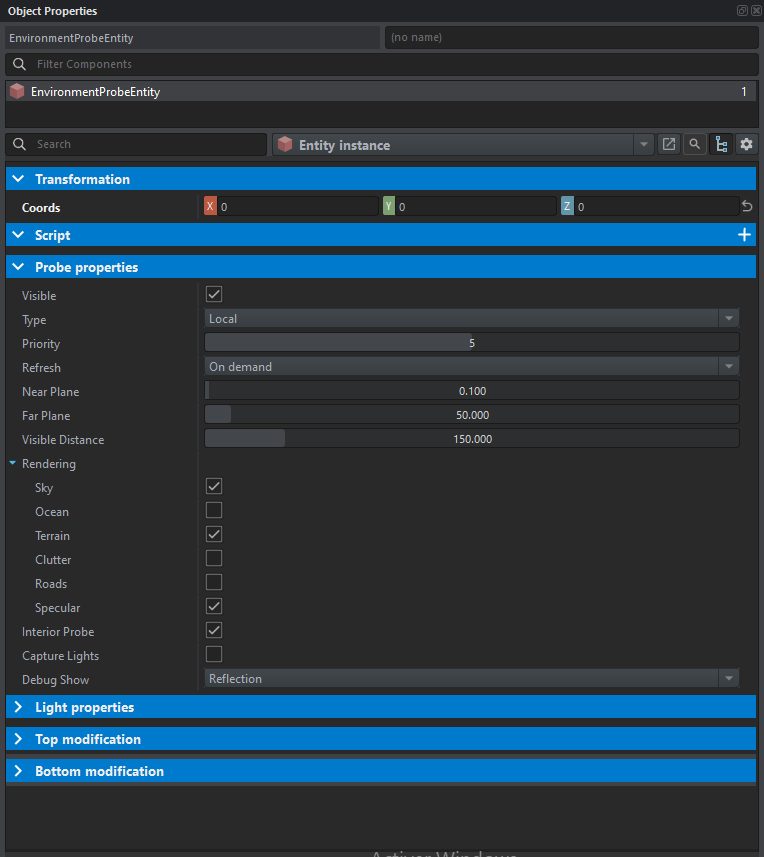
- Visible: On/Off
- Type: Explained above
- Priority: Priority in "render", always 5
- Refresh: When the probe will refresh ? On demand if environnement will update during the game (Always)
- Near plane & Far plane: I'll come back to this a little later in topic.
- Visible Distance: Visible Distance of probe reflection modification (150m is a good value, don't exceed for optimization)
- Rendering: Which relfection will the probe capture?
- Interior Probe: If the probe is located indoors, check yes otherwise no
- Capture Lights: Turn it on if you have lights in your room.
- Debug Show: Debug visualisation on the probe sphere.
As we've seen, a probe will capture and calculate reflections for all light sources and reflections from things checked in Rendering and Capture Lights.
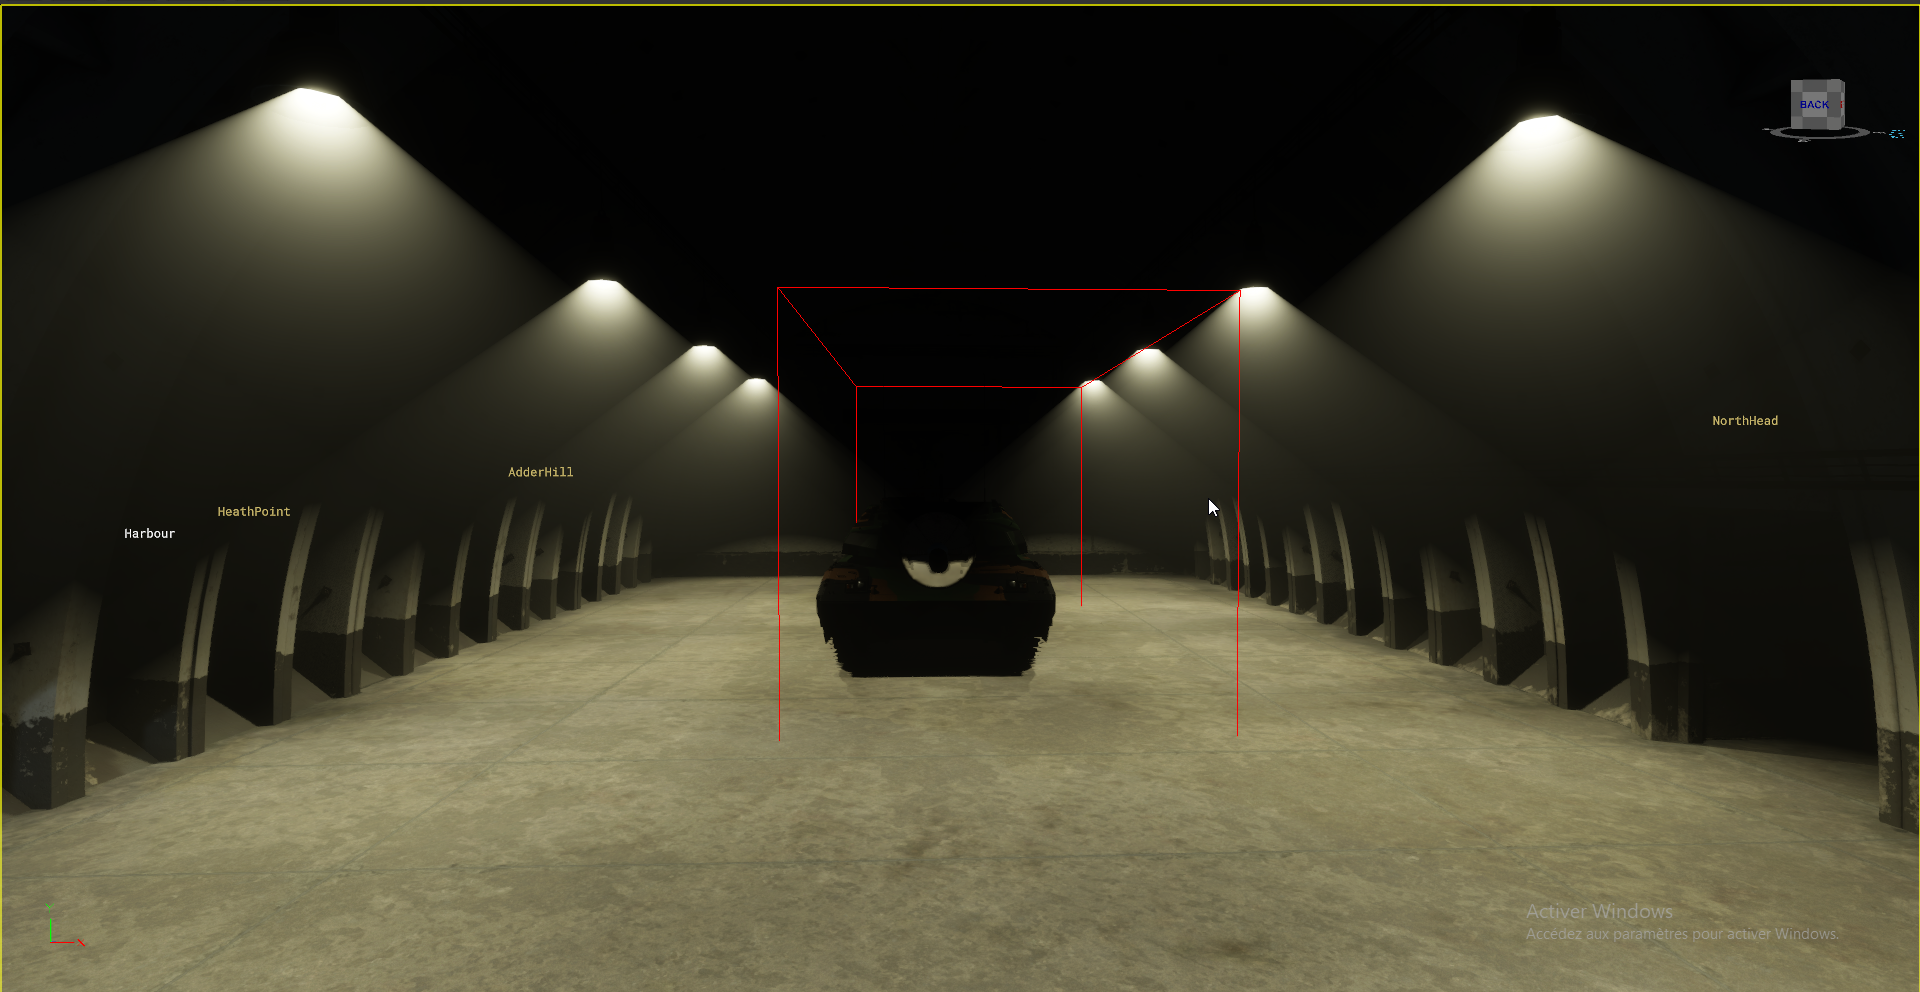
Near Plane & Far plane are the parameters that define the zone from which the probe will retrieve information on reflections. Near Plane is the most precise zone and consumes the most performance, so Near Plane < Far Plane. And Far Plane allows less precise calculation of relfections, but saves performance.
In yellow, there is Far Plane & in blue, there is Near Plane.
Capture light must be turned on if there are lights in your room, here are a comparation without and with captured light:
Without:
With:
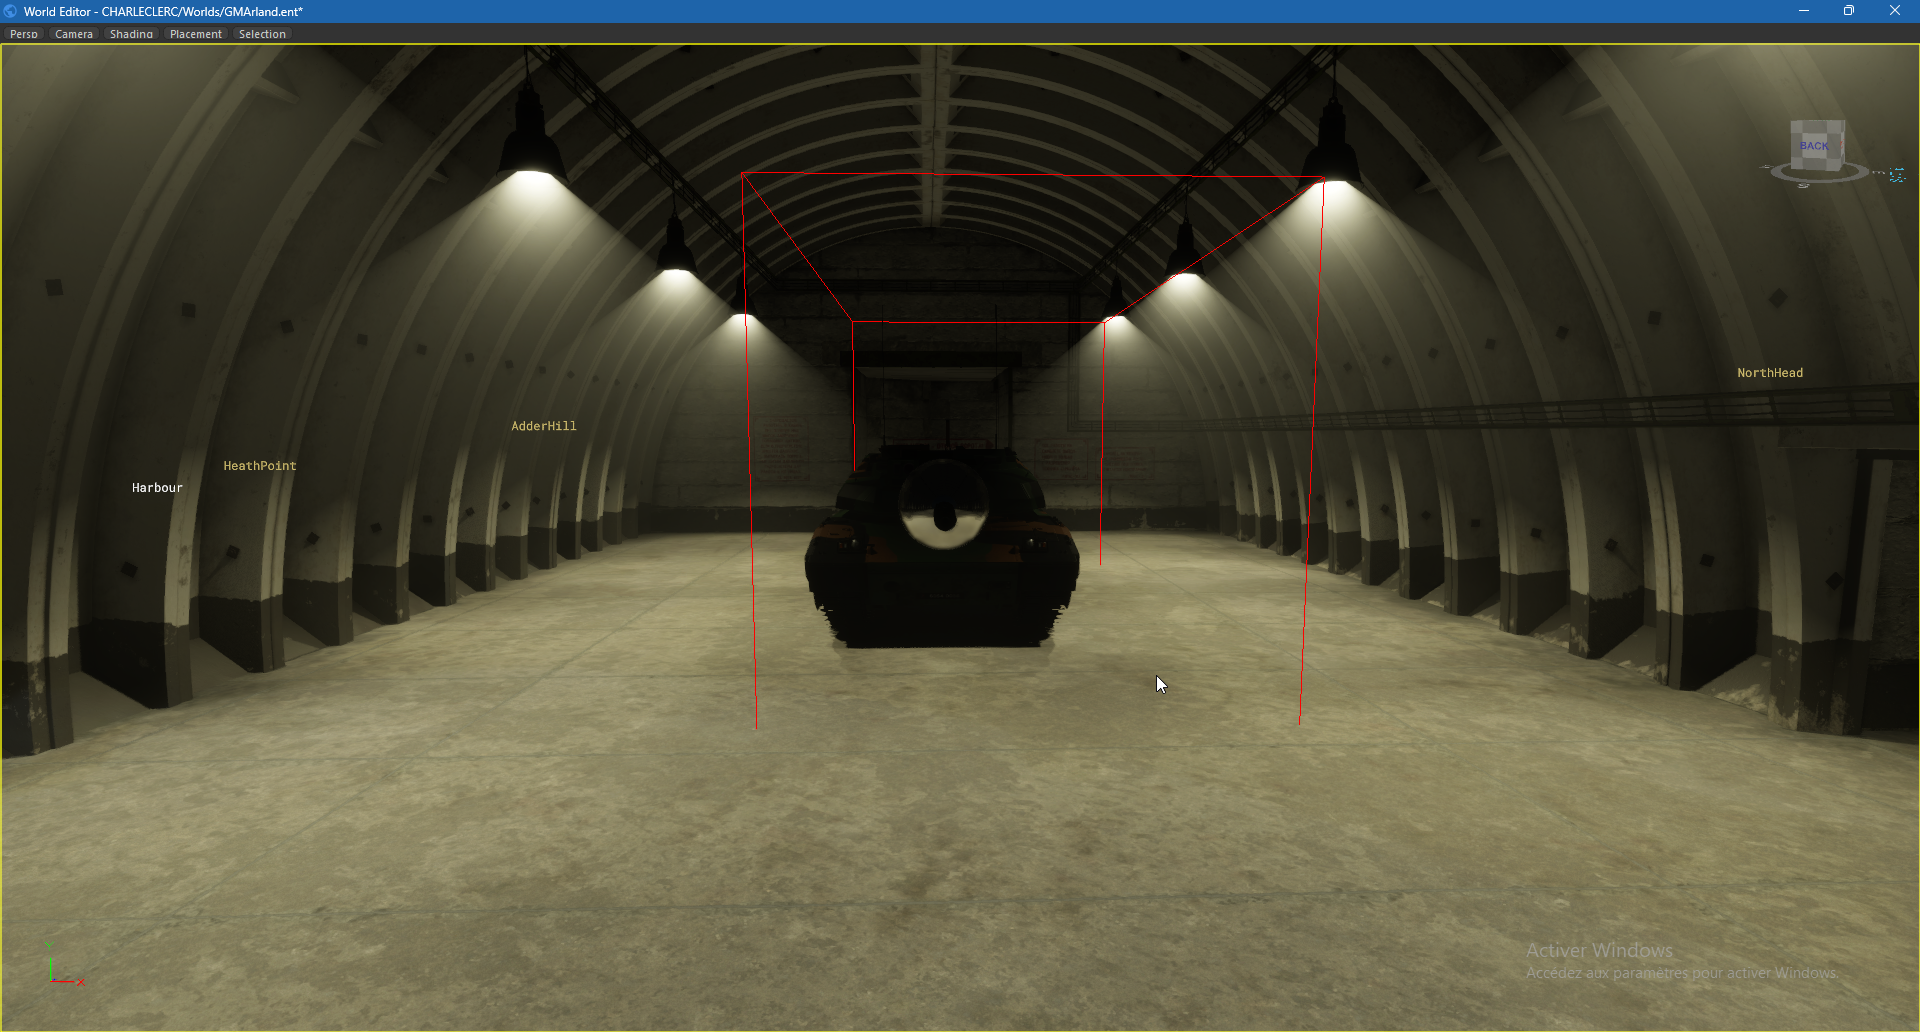
For a good result, you can also play with some parameters in Light Properties