# Preliminary Steps
**Information: This tutorial will be based on a French army vehicle, the VBMR-L Serval. The 3D model is from Arma Mod France Studio where i'm Enfusion Integrator.**
### ****1. Create Necessary Folders****
To start your project correctly, create a folder specifically for your project to centralize your files and other resources.
Once this folder is created, make two subfolders:
- One for 3D models, name it "Sources"
- Create another subfolder within "Sources" called "Textures"
### ****2. Create an ENFUSION Project****
Once the project is created, open it in your file explorer (Windows), and bohemia interactive recommend creating this folder structure:
[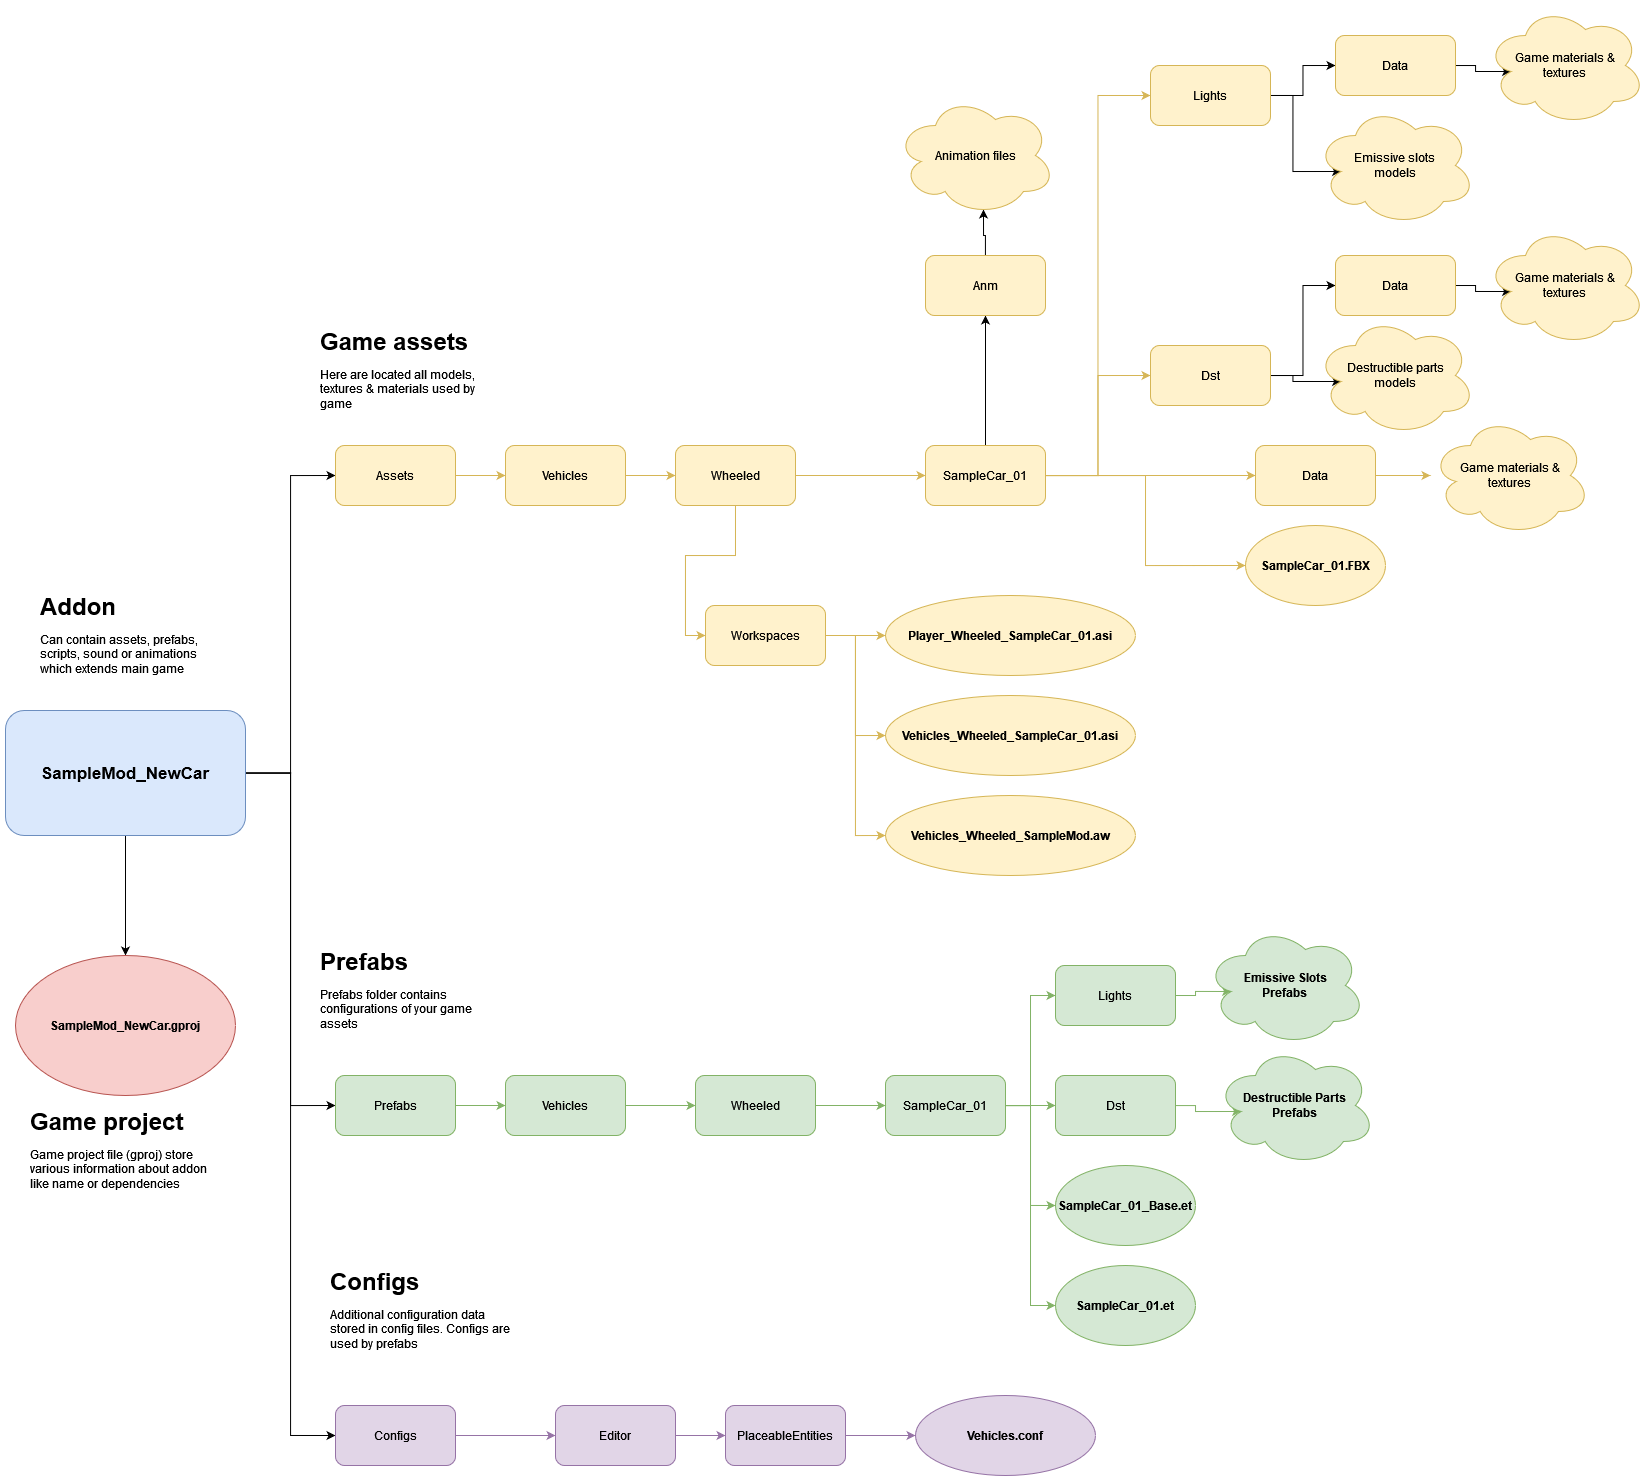](https://wiki.nabla.sh/uploads/images/gallery/2024-11/d5zimage.png)
****Recommended File Structure for Arma Reforger**** You can organize it differently, but you may encounter bugs and difficulties.
****Reminder:**** Rectangles represent folders. Bubbles & clouds represent a file or other item.
And, of course, replace "SampleCar\_01" with the name of your vehicle, following this format.
Once this is done, you can move on to the next step.
### ****2. The 3D Model****
The next step is to find an appropriate 3D model. Here are some tips for choosing well:
- Low poly PBR model (like Unreal Engine or Unity)
- With interior (if possible)
- A manageable quantity of polygon
### ****3. Vehicle creation "RoadMap"****
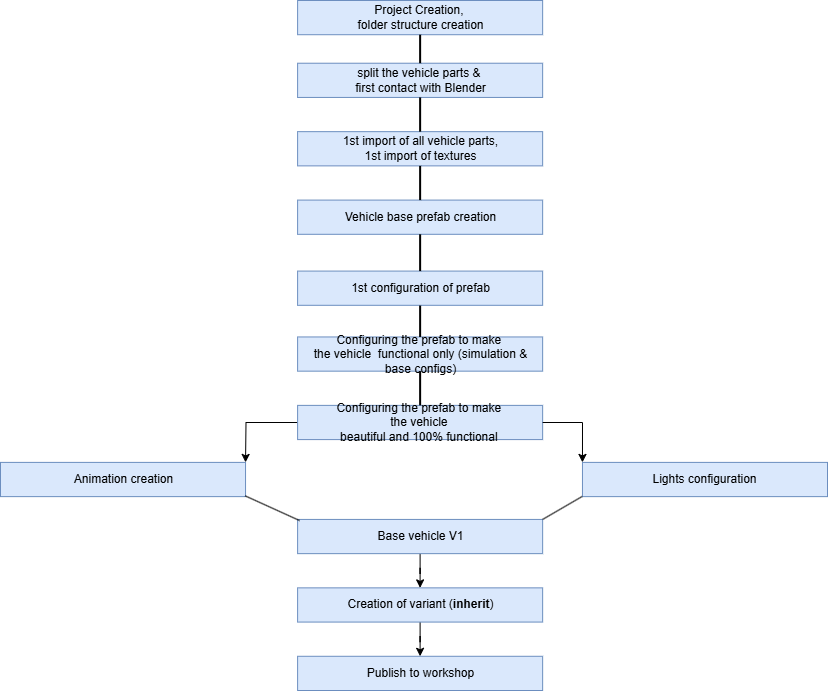If you need to, you can go back at any stage to the previous stages to achieve a good final result.